No edit summary |
(→Notes) |
||
| (31 intermediate revisions by 17 users not shown) | |||
| Line 12: | Line 12: | ||
{{Quote|The crane will lower that dumpster, then we can jump across|[[Francis]]}} |
{{Quote|The crane will lower that dumpster, then we can jump across|[[Francis]]}} |
||
| + | '''The Crane''' is the second chapter of the fourth campaign, [[Dead Air]]. |
||
| − | '''The Crane''' is the second chapter of the fourth campaign, [[Dead Air]]. [[The Survivors]] are in the [[Harbor View Hotel|Harbor View Hotel's]] kitchen. They get back to the rooftops, by passing through the hotel's upper floors, to then reach the crane. In the first [[Crescendo Event]] of the Campaign, they must activate the crane which lowers a dumpster to get to another rooftop. The Survivors are usually given two [[Gas can]]s to burn the [[Infected]]. Later, the Survivors arrive in the upper floors of an office complex. They navigate down through the office, out the main entrance, finally to reach a [[safe house]] across the street. There is an [[Crescendo Event#panic event|alarmed car]] that can attract the [[horde]]. |
||
| + | |||
| + | [[The Survivors]] start out from the safe room in the [[Harbor View Hotel|Harbor View Hotel's]] kitchen. They exit through the hotel's service dock and climb a fire escape to reach the hotel's upper floors and the hotel roof. In the first [[Crescendo Event]] of the Campaign, they activate the noisy crane which lowers a dumpster which enables them to cross over to a second and subsequent rooftops. |
||
| + | |||
| + | Thereafter they enter the first of two office buildings and make their way through open-plan office spaces and down the stairs to the street below where a [[safe house]] is found in a storage facility opposite. |
||
| + | |||
| + | This a relatively long and challenging chapter with manifold enemies, navigational twists and turns, tight combat spaces and side rooms to explore. Along the way they are likely to encounter a full variety of Special Infected including at least one Tank. For these reasons this chapter counts as one of the most high-risk experiences in the game for human Survivors. |
||
== Strategy == |
== Strategy == |
||
| Line 33: | Line 39: | ||
[[File:L4d airport02 offices0059.png|thumb|The crane.]] |
[[File:L4d airport02 offices0059.png|thumb|The crane.]] |
||
| − | The Survivors start out in |
+ | The Survivors start out in the hotel kitchen safe room where [[first-aid kit]]s, [[Weapons#Tier 1|tier 1]] weapons, and ammo sit on a counter. If you're starting out here, grab some first aid and a weapon of your choice. If you started from the previous chapter, The Greenhouse, heal up and replenish your ammo. |
| + | Since there is a rather large and noticeable hole in the wall beside the safe room door it is possible to kill those Infected seen immediately outside the exit door. Once everyone is ready, open the door and head out in the usual way. |
||
| − | Outside, you will be in a cargo room. Kill what zombies are there and head outside through the garage-like openings. There's a fence blocking the other side, but you can use a pile of trash and dirt to climb over it. Jump on top of the pile of boxes at the end of the fire escape and go up the ladder, and the subsequent stairs. Caution: The Director seems to love to put a Hunter, a Smoker or even a Boomer on the stairs. Take heed of this, and proceed upwards. You can enter the building through a large bathroom window. This is the bathroom of a hotel suite. The bedroom has a fairly messy bed, but it's possible that tier 2 weapons will spawn there, so keep an eye out! As you proceed through the empty halls of the hotel, look into every room you can; goodies (pills and grenades, for instance) can spawn inside of them. However, remain wary of not only Special Infected, but also Tanks and Witches. The Witch can spawn in your way or in any of the rooms. The latter of the locations can be avoided. However, praise be the person who can avoid the Tank. Make your way up the stairs at the end of the hall, and head into the room on the right. On the table beside the window is another possible location for [[Weapons#Tier 2|tier 2]] weapons to appear. If you find them here, you're in luck, because it's time to fight the horde. |
||
| + | '''To The Hotel Roof''' |
||
| − | An ominous crane looms nearby. That's right, time for the first [[Crescendo Event]] of Dead Air! If you found any pipe bombs, those can help you and your teammates out a lot, obviously. Fortunately, if you didn't, there are still some [[gas can]]s near a corner of the fence. Set those up, and when everyone's set, hit the switch to lower a dumpster. Once it's down, you can clamber up it to reach the next roof. But there's a catch: That crane is making an awful squeaking noise, and your buddies from the horde just happened to notice. They're not happy. |
||
| + | |||
| + | Outside the safe room is the hotel's service dock. A large number of loitering Infected must be dispatched before jumping over a fence with the help of a dirt pile. This fence is a non-return barrier and teams must ensure all members cross over in a co-ordinated way to avoid having someone incapacitated beyond reach of assistance. A pale green colored dumpster allows access to a vertical yellow ladder and an external fire escape. Care is needed at this point as The Director often spawns a Hunter, a Smoker or even a Boomer on this stairway. |
||
| + | |||
| + | The fire escape gives access to a hotel suite bathroom window. The bedroom contains a fairly messy bed on which can sometimes be found Tier 2 weaponry. The hotel corridor outside features numerous side rooms which usually contain supplies such as pills and grenades. Care is needed because this hallway is a very popular attack path for 'hurry-up' hordes and a full range of Special Infected, including a Tank. A Witch can either spawn directly in the corridor or in any of the side rooms. |
||
| + | |||
| + | Climbing one flight of stairs at the end of the hall brings players to residential suite with a window giving access to an adjacent rooftop. A table near the window is another possible location for a gift of [[Weapons#Tier 2|tier 2]] weapons. |
||
| + | |||
| + | Before progressing to operate the crane to lower the dumpster, it is sensible to take down any visible enemies. For example, the air conditioning structure to the front gives excellent lines of sight over adjoining rooftops. A good idea is to do whatever rooftop sniping is necessary using (e.g.) a Hunting Rifle and then return to the apartment building to switch weapons or pick up a fresh Tier 2 before moving onto the actions outlined in the following paragraph. Note that a Tank or Witch may spawn at some distance away on an neighboring rooftop during this curtain-raiser and being prepositioned on the air conditioning structure gives you ample opportunity to nix this threat with little risk. Bugging out back to the apartment building is a line of escape if the situation starts to get out of hand. |
||
| + | |||
| + | '''The Crane and Dumpster''' |
||
| + | |||
| + | An ominous crane looms nearby which a Survivor will provide a dialog prompt about in case there's any doubt. Operating the crane to lower a dumpster will trigger Dead Air's first [[Crescendo Event]]. To prepare for this event it is recommended to set out the [[gas can]]s found inside the crane enclosure at convenient and obvious choke points. One can at the fence entrance and a second next to the dumpster will work well. Once crane starts to operate its noise sets off the Crescendo Event. The Common Infected horde will always attack from in front (where the dumpster was standing. From time to time a secondary horde and a Boomer or Smoker will arrive from the hotel building players have recently traversed. |
||
| + | |||
| + | Tactics to combat this attack range from: |
||
| + | |||
| + | 1. Holding position inside the crane enclosure, shooting down enemies as they appear and activating the gas cans. This is a generally successful tactic although it is likely that at least one team member will require assistance at some point. |
||
| + | |||
| + | 2. Cramming the entire team up onto the crane platform where it shoots and melees to victory. This tactic renders the team invulnerable to Special Infected attack since they simply cannot access the team. A highly successful tactic. |
||
[[File:L4d airport02 offices0060.png|thumb|The law office.]] |
[[File:L4d airport02 offices0060.png|thumb|The law office.]] |
||
| + | 3. Set up the gas cans as appropriate, activate the crane and retreat to the hotel apartment overlooking the rooftop. Enemies can attack only via two tight chokepoints and the apartment doorway behind the team. A highly successful tactic. |
||
| − | There are a few different ways to go about this. You can either wait around inside of the fence, shooting the gas cans when you see fit or climb on top of a structure on the roof. The most successful tactic is to get the entire team up on the crane platform and melee or shoot. If you melee, the group is practically invulnerable. Regular and Special Infected that you see climbing up will be quickly knocked back down. Hunters will be punted off and killed, while Smokers will not be able to grab anyone longer than a split second. They can't get you. Special Infected won't have a chance to break your defenses when you're so close together. Once that dumpster's down, climb on up and keep going. |
||
| + | Once the dumpster is down, the team can proceed to the next series of rooftops. Note that on arriving at the dumpster it is likely that a Smoker will be heard moving along on the roof above. If so, he will try to snag a team member from the high roof to the rear. His behavior is highly predictable and he is thus easy to shot down. |
||
| − | If you are lucky enough (or unlucky enough) to have a Tank spawn, there is an easy way to get rid of it, but it requires teamwork and skill. When you have climbed the ladder on the crane, there is a wooden bridge that you can cross. If a Tank spawns, try and bring it over to the bridge and then jump over the gap next to it. If you are lucky enough, the Tank will fall in to the gap and land on the ground below. But keep moving, because it will climb back up and chase you down. |
||
| + | As an aside, the worst-case scenario involves a Tank spawning on the crane rooftop. The enclosing fence makes it particularly hard for players to evade and run-and-gun. If a player has a Molotov, now is the time to use it. Depending on where he spawns, players can engage him with long-range gunfire and even entice him onto a roof parapet where he might fall off the building to the ground below. Another good tactic is (3) above: retreat to the hotel apartment and cone him with concentrated fire from the window. |
||
| − | After climbing the dumpster, there is still a fair way to travel and many threats to overcome. From this point on, it is strongly recommended that the team exercise particularly strict Tier 2 fire discipline and make maximum use of pistols to conserve ammunition since the next ammo resupply is buried away inside the lawyer's office building. |
||
| + | The next section means working across two large open roof areas with a fair number of loitering Common Infected. Since the next ammo resupply is some distance away, it is recommended that strict Tier 2 fire discipline be maintained. Pistol use should be maximized. |
||
| ⚫ | |||
| ⚫ | |||
| ⚫ | There is way of skipping this Crescendo Event |
||
| ⚫ | There is way of skipping this Crescendo Event. To do this you have to go inside of the crane area. Jump onto the wooden crate with the two gas cans on top. From there, jump onto the round exhaust vent. Then you jump on top of the gate. Follow it down until you reach the end gate leading to the edge of the roof. You're then going to jump across onto the metal box on the other building. Once you land on it, jump again onto the roof and there you have skipped the Crescendo Event. Be careful when jumping across. Should you land wrong, you will hang off the metal box and you won't be able to be rescued, unless you have other people playing with you. (Note: This is only available to players who have newly gotten ''Left 4 Dead''. There is an update patch to close this alternate path). |
||
| − | The first rooftop simply requires you to turn right and cross over to the next one. On this one, deal with the Infected, remaining cautious for mainly Smokers, and head up the small structure on the right side of this roof. You can cross to the other rooftop from there. After this next rooftop, you will enter an office building. Creepy, right? Again, look around for supplies. You never know what you can find. Continue through the building, until you reach a small office. In here, [[Tier 2]] weapons can spawn on the table, and pills or Molotovs can spawn on the cabinets to the right. Once you've looked around, head out of this room's window and cross over to the other building via the wooden planks. As with the last level, be entirely careful of Smokers. Once inside, head down the hall and look to your left. Tier 2 weapons can spawn here if you do not have them yet along with an ammo pile, and to the other side of the room is a [[first aid station]]. |
||
| + | '''The Lawyers' Office Building and Cube Farm''' |
||
| − | Get what you can, heal up or take those pills if necessary, and keep going. The stairs let out to the edge of an area with many cubicles, which actually make great hiding places for the Infected. There are two floors of office cubicles, often prompting Zoey to ask Louis: "Hey Louis, all these cubicles make you homesick?" Despite what Louis may feel about these offices, they're not all bad and they're not all good. The cubicles give the Infected obstacles to climb over and can slow them down during an attack. Plus, the many rooms on these two floors can contain pills for those of you who are feeling the pressure. However, the offices are a highly likely place for the Tank or a Witch to spawn. If you have yet to encounter a Tank, be ''extremely'' wary. |
||
| + | |||
| + | The first rooftop is a large one dotted around with air conditioning housings. Teams simply need to sweep across and take a bridge across the gap to an adjacent rooftop to gain access to the lawyer's office building. |
||
| + | |||
| + | There are numerous Infected on both roofs and Smokers, a Witch and even a Tank may be expected to spawn during this stage. |
||
| + | |||
| + | Teams have a choice of two windows to enter the lawyers' office building and need to proceed to the senior partner's luxurious office. Side rooms should be checked for supplies as a matter of course. A hurry-up horde is likely to spawn from behind when the team enters the law office. |
||
| + | |||
| + | Quitting the law firm, teams enter the next building over a plank bridge. This is a multi-floor office building characterized by worker cubicals and a large number of enclosed office spaces which need to be searched and cleared. A resource room with a first aid station is the re-supply point for the team's final push and contains an ammo pile and replacement Tier 2 weapons (look around the corner near the piles of photocopy paper). |
||
| + | |||
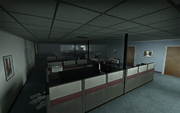
| + | Internal stairs bring teams to the first of two cube farms which are densely populated with a mix of alert and passive Common Infected. The sudden appearance of these office cubicals will sometimes prompt Zoey to ask Louis: "Hey Louis, all these cubicles make you homesick?" |
||
| + | |||
| + | Despite what Louis may feel about these offices, they are a mixed blessing. The cubicles give the Infected obstacles to climb over and can slow them down during an attack. Plus, the many side rooms on these two floors can contain pills. On the downside, these two floors of cube farms are highly likely places for a Tank or a Witch to spawn. If teams have yet to encounter a Tank there is a need to be ''extremely'' wary. At least one Smoker will attempt to sneak up from the rear and will often snag a team member; the good news is that the victim will invariably not be dragged too far on account of the office cubicles blocking his pull. |
||
[[File:L4d airport02 offices0061.png|thumb|The offices.]] |
[[File:L4d airport02 offices0061.png|thumb|The offices.]] |
||
| + | Once teams reach the ground floor it will be seen that the street outside is thickly popluated with Common Infected who block access to the storage facility containing the safe room. A sound tactic is to thow a Pipe Bomb from the office building doorway and charge to safety once it has exploded. |
||
| − | Treading lightly and swiftly, continue down through the building. Once you reach the ground floor, you can head out the front door and on to a street. If you still need pills, search the rooms in the building before you leave. There's a storage building on the other side of the street. Another potential location for the Witch is on this street or just outside of the [[safe room]]. Cross the street — be careful not to set off the car [[Crescendo Event#Car alarms|alarm]]! — and get inside! Good job, you made it through this chapter! Take a breath, and get ready for [[The Construction Site]]. |
||
| + | |||
| + | However teams must expect a last challenge or two before the end: a Witch can spawn in the street or even right outside the safe room door; a Tank might appear; or a stray shot can set off an alarmed car opposite the safe room building. |
||
| + | |||
| + | Good job, you made it through this chapter! Take a breath, and get ready for [[The Construction Site]]. |
||
| + | |||
| + | |||
| ⚫ | |||
| + | The map uses the Versus version from ''Left 4 Dead'' even on co-op modes, meaning the chain-link fence that once protected the Survivors surrounding the crane during the crescendo event has now been mostly removed, and a small building was added to provide cover for the Infected. This makes holding out near the crane an extremely dangerous place since Tanks and Chargers can easily knock Survivors down to their doom. In addition to the changes already present in the Versus version, the fridge right outside the safe house no longer has a door, obviously to keep players from camping inside and waiting for a crescendo to cease. One chainlink fence around the crane was re-added, between the crane and the dumpster, and the car alarm can no longer be activated early from the rooftops to remove the threat from a more advantageous position. The car will appear to have no alarm at first, but will flash its lights once the Survivors are on the street to signify that the alarm is on. The trailer on the street next to the safe house was moved away from the rooftop area, thus preventing Survivors from skipping the rest of the map entirely. |
||
[[File:L4d airport02 offices0062.png|thumb|Outside of the offices.]] |
[[File:L4d airport02 offices0062.png|thumb|Outside of the offices.]] |
||
=== [[Versus]] === |
=== [[Versus]] === |
||
| ⚫ | |||
| ⚫ | |||
Now that humans are controlling the Special Infected, things can only get harder. However, they can't spawn until you leave the safe room. That doesn't mean that you should let them have a good chance to find just the right spot, though! Hurry up and get your supplies, and get ''running''! |
Now that humans are controlling the Special Infected, things can only get harder. However, they can't spawn until you leave the safe room. That doesn't mean that you should let them have a good chance to find just the right spot, though! Hurry up and get your supplies, and get ''running''! |
||
| Line 80: | Line 124: | ||
[[File:CraneHunter.png|thumb]] |
[[File:CraneHunter.png|thumb]] |
||
| − | '''Hunters''': Although you've found better pounce locations in [[Riverside]] and [[Fairfield]], this is a good level for you. Nearby rooftops are perfect for the accurate Hunters, and close corridors are good for the not-so-accurate Hunters. Just remember, pounce lone Survivors, not a group! Inversely, a group that is foolish enough to gather around a rooftop edge can all be eliminated with one pounce. By pouncing one, the others will stumble backwards and over the edge—effectively incapacitating them all! As with the Boomer, a Witch is a true blessing. Crouch behind or in front of her. Watch as Survivors spot you and either shoot you, inadvertently startling the Witch; or they'll wait and slowly form a plan, giving other Infected time to set up. If one macho Survivor decides that they're the "big man with the shotgun," prove them wrong. In fact, pounce them wrong! They'll attempt to kill you and the Witch with headshots in which case you pounce him as he gets close. This will in turn startle the Witch. Although this is frowned upon frequently, at the beginning of this level, a Hunter can go up to the rooftop with the crane and use the flaming barrel to light themselves on fire. Then, if you jump on top of the gas cans, you will light them on fire, and destroy them before the Survivors get the chance to use them in defense. This will, however, inevitably kill your Hunter. |
+ | '''Hunters''': Although you've found better pounce locations in [[Riverside]] and [[Fairfield]], this is a good level for you. Nearby rooftops are perfect for the accurate Hunters, and close corridors are good for the not-so-accurate Hunters. Just remember, pounce lone Survivors, not a group! Inversely, a group that is foolish enough to gather around a rooftop edge can all be eliminated with one pounce. By pouncing one, the others will stumble backwards and over the edge—effectively incapacitating them all! As with the Boomer, a Witch is a true blessing. Crouch behind or in front of her. Watch as Survivors spot you and either shoot you, inadvertently startling the Witch; or they'll wait and slowly form a plan, giving other Infected time to set up. If one macho Survivor decides that they're the "big man with the shotgun, " prove them wrong. In fact, pounce them wrong! They'll attempt to kill you and the Witch with headshots in which case you pounce him as he gets close. This will in turn startle the Witch. Although this is frowned upon frequently, at the beginning of this level, a Hunter can go up to the rooftop with the crane and use the flaming barrel to light themselves on fire. Then, if you jump on top of the gas cans, you will light them on fire, and destroy them before the Survivors get the chance to use them in defense. This will, however, inevitably kill your Hunter. |
'''Smokers''': The time to clash with the Survivors has returned. But unlike your Hunter, Boomer or Tank brethren, you do not charge in an attack. You do not fight in close quarters. No, you are certainly unique. You are the long range attacker. Stick to the rooftop shadows, pull the last Survivor to enter that building. Pull the one who is near the edge. In short, you are necessary for the Infected victory in this level. Working with the Boomer, pull one of the four slimed Survivors or alternatively, pull a clean one and separate the group. Stay back on the roofs and wait for the opportune moment. See those wooden plank crossings? They are your best friend. As Survivors cross, tug one on to the edge. Witches are your even greater friends. Use them to your advantage. Drag Survivors into her. Sure, she'll nag you about it after wards, but at that point she'll be too angry with the Survivor you just gave her. |
'''Smokers''': The time to clash with the Survivors has returned. But unlike your Hunter, Boomer or Tank brethren, you do not charge in an attack. You do not fight in close quarters. No, you are certainly unique. You are the long range attacker. Stick to the rooftop shadows, pull the last Survivor to enter that building. Pull the one who is near the edge. In short, you are necessary for the Infected victory in this level. Working with the Boomer, pull one of the four slimed Survivors or alternatively, pull a clean one and separate the group. Stay back on the roofs and wait for the opportune moment. See those wooden plank crossings? They are your best friend. As Survivors cross, tug one on to the edge. Witches are your even greater friends. Use them to your advantage. Drag Survivors into her. Sure, she'll nag you about it after wards, but at that point she'll be too angry with the Survivor you just gave her. |
||
| − | '''Tanks''': Is it the Hulk? Is it a steroid-junkie? No, silly! It's a Tank! There are times that call for a Smoker, there are times that call for a Hunter and there are even times that call for Boomers. You're in luck, Mr. Tank, as it's ''always'' a good time for the Infected when a Tank shows up. If a Survivor is constricted or pounced, do ''not'' attempt to "help" the Smoker or Hunter. Your attack will free them and kill your buddy in the case of the Hunter. You may end up saving the Survivor's life. Avoid fire! Tank no like fire, Tank like crushing Survivor skulls! Memorize which Survivor has a Molotov before becoming the Tank. Be wary of them. Also, it is important to note that incapacitated Survivors should be left alone if more are still standing. If a Survivor shows teamwork and cooperation by helping their friend up, show them the error of their ways. Work with your fellow Infected, lead them in times of doubt and above all, don't underestimate a well aimed rock-throw! You may be spawn in the roof with the crane. Punch the |
+ | '''Tanks''': Is it the Hulk? Is it a steroid-junkie? No, silly! It's a Tank! There are times that call for a Smoker, there are times that call for a Hunter and there are even times that call for Boomers. You're in luck, Mr. Tank, as it's ''always'' a good time for the Infected when a Tank shows up. If a Survivor is constricted or pounced, do ''not'' attempt to "help" the Smoker or Hunter. Your attack will free them and kill your buddy in the case of the Hunter. You may end up saving the Survivor's life. Avoid fire! Tank no like fire, Tank like crushing Survivor skulls! Memorize which Survivor has a Molotov before becoming the Tank. Be wary of them. Also, it is important to note that incapacitated Survivors should be left alone if more are still standing. If a Survivor shows teamwork and cooperation by helping their friend up, show them the error of their ways. Work with your fellow Infected, lead them in times of doubt and above all, don't underestimate a well aimed rock-throw! You may be spawn in the roof with the crane. Punch the Survivors so they will all be hanging for their lives. |
| Line 93: | Line 137: | ||
'''Secret Ledge Method''' |
'''Secret Ledge Method''' |
||
| − | :Under the crane on the side of the building, there is a small ledge that juts out and runs along the side of the roof. If you slowly edge your way over and on to the ledge without falling off, it can work as a defensible position. The [[Common Infected]] will only come at you from the other side of the crane and the only Special Infected you need to watch out for are the Smokers. Whilst on this ledge, Hunters seem to have extreme trouble trying to pounce you. So much trouble, that they will often leave themselves out in the open and growl at you. The Tank will also have trouble getting you here. The worst that can happen is that he will try to throw a rock at you. If this happens, take cover behind the ladder in front of you, or the fence further back nearer the corner. Often, Tanks will simply find their way down into the alleyway below you and spend the entire round trying futilely to attack you. Your only concern is the Smoker. Up to three of them can spawn at once. They will not be able to pull you back onto the roof, however, they can constrict you and that is why it is recommended to perform this trick with at least one other person. |
+ | : Under the crane on the side of the building, there is a small ledge that juts out and runs along the side of the roof. If you slowly edge your way over and on to the ledge without falling off, it can work as a defensible position. The [[Common Infected]] will only come at you from the other side of the crane and the only Special Infected you need to watch out for are the Smokers. Whilst on this ledge, Hunters seem to have extreme trouble trying to pounce you. So much trouble, that they will often leave themselves out in the open and growl at you. The Tank will also have trouble getting you here. The worst that can happen is that he will try to throw a rock at you. If this happens, take cover behind the ladder in front of you, or the fence further back nearer the corner. Often, Tanks will simply find their way down into the alleyway below you and spend the entire round trying futilely to attack you. Your only concern is the Smoker. Up to three of them can spawn at once. They will not be able to pull you back onto the roof, however, they can constrict you and that is why it is recommended to perform this trick with at least one other person. |
'''Crane Controls Method''' |
'''Crane Controls Method''' |
||
| − | :Up on the actual crane itself where you start, the attack from is a viable place to make a stand. Set up your defenses and start the round, you won't even need to move; you're already in place! From there, the entire team can shoot or [[melee]] through the hordes of Infected easily. That is, until the Tank arrives. When he does, if all four or at least three Survivors concentrate their fire on him, he should die before he gets to you; otherwise, it's time to abandon the crane. Getting stuck up there with a Tank is not a good idea. |
+ | : Up on the actual crane itself where you start, the attack from is a viable place to make a stand. Set up your defenses and start the round, you won't even need to move; you're already in place! From there, the entire team can shoot or [[melee]] through the hordes of Infected easily. That is, until the Tank arrives. When he does, if all four or at least three Survivors concentrate their fire on him, he should die before he gets to you; otherwise, it's time to abandon the crane. Getting stuck up there with a Tank is not a good idea. |
'''Truck Exploit''' |
'''Truck Exploit''' |
||
| − | :It is possible to access the ground level of the map by falling off the ledge onto the truck on the side of the building furthest from the crane. The first player runs off the edge holding their Jump Button, so as not to grab onto the ledge when they fall, and falls onto the truck, where they will be incapacitated. The next player does the same, only this time holding their Action aimed at the incapacitated player on the way down. If executed successfully, the player will slow down in the air, taking almost no damage, simultaneously reviving the player on the truck. A third player can then join them. The first two then jump off the front of the truck towards the "Give Blood" bus stop, jumping forward as far as possible, as the ground around the truck will kill the player almost instantly from any height. The fourth player, still on the roof, can hit the crane switch and fall onto the truck, where the player waiting for him will help him up. These two can then jump down, and all four can hide in the corner of the map, out of range of all zombies. There is also a long hallway to hide down, as the occasional zombie will find its way down without dying. |
+ | : It is possible to access the ground level of the map by falling off the ledge onto the truck on the side of the building furthest from the crane. The first player runs off the edge holding their Jump Button, so as not to grab onto the ledge when they fall, and falls onto the truck, where they will be incapacitated. The next player does the same, only this time holding their Action aimed at the incapacitated player on the way down. If executed successfully, the player will slow down in the air, taking almost no damage, simultaneously reviving the player on the truck. A third player can then join them. The first two then jump off the front of the truck towards the "Give Blood" bus stop, jumping forward as far as possible, as the ground around the truck will kill the player almost instantly from any height. The fourth player, still on the roof, can hit the crane switch and fall onto the truck, where the player waiting for him will help him up. These two can then jump down, and all four can hide in the corner of the map, out of range of all zombies. There is also a long hallway to hide down, as the occasional zombie will find its way down without dying. |
| − | |||
| ⚫ | |||
| − | In the [[Dead Air]] port released for ''Left 4 Dead 2'', this map is identical to the versus map used in ''Left 4 Dead''. Another change to the map is that the fridge right outside the safe house no longer has a door, obviously to keep players from camping inside and waiting for a crescendo to cease. |
||
== Notes == |
== Notes == |
||
| ⚫ | * Just outside of the [[safe room]] is a small room with a large metal door. This door is entirely invulnerable to any kind of damage. That applies to hordes, Tanks, Witches and all other Infected. This room can be an extremely useful exploit. In the event of a Tank appearing soon after leaving the safe room (such as the hallway after climbing the ladder), one person can lead it into the room, run out (or die, whichever is more convenient) and someone can close the door, ending the Tank's reign of terror. It is rather ironic that this door is actually stronger than the starting door of the "safe room." It does not appear in ''[[Left 4 Dead 2]]'' |
||
| − | * The floor that the Survivors start on when reentering the hotel is the ''fourth'' floor with the first door number seen through the hotel rooms entranceway being 40. This is a subtle reference to the game's title. |
||
| ⚫ | |||
| ⚫ | * Just outside of the [[safe room]] is a small room with a large metal door. This door is entirely invulnerable to any kind of damage. That applies to hordes, Tanks, Witches and all other Infected. This room can be an extremely useful exploit. In the event of a Tank appearing soon after leaving the safe room (such as the hallway after climbing the ladder), one person can lead it into the room, run out (or die, whichever is more convenient) and someone can close the door, ending the Tank's reign of terror. It is rather ironic that this door is actually stronger than the starting door of the "safe room." It does not appear in |
||
| − | * In online versus mode, the fence perimeter protecting the crane was replaced with a small building beside the crane. |
||
| ⚫ | |||
* If you have very high health, and you run and jump into the tree next to the alarmed car from the second building after the crescendo event, it is possible to survive without being incapacitated. If you then take pills or heal yourself, you can jump onto the bus stop shelter, and onto the ground, skipping the entire office part of the chapter. |
* If you have very high health, and you run and jump into the tree next to the alarmed car from the second building after the crescendo event, it is possible to survive without being incapacitated. If you then take pills or heal yourself, you can jump onto the bus stop shelter, and onto the ground, skipping the entire office part of the chapter. |
||
| − | * In Survival Mode, if the player stays where they are on the building when the Tank |
+ | * In [[Survival Mode]], if the player stays where they are on the building when the Tank comes, because he usually spawns in the building in front of you, if you watch him, he will constantly climb in and out of the window and sometimes throw rocks at it. The only way to stop him from doing this is to toss a Molotov or shoot him. When the next Tank comes, he will do the same thing. |
| + | |||
{{Campaigns|Dead Air}} |
{{Campaigns|Dead Air}} |
||
| + | |||
| + | [[ru:Кран]] |
||
[[Category:Dead Air]] |
[[Category:Dead Air]] |
||
[[Category:Chapters]] |
[[Category:Chapters]] |
||
Revision as of 17:02, 1 April 2019
| |||||
| Chapter 2 The Crane | |||||
| Campaign | Dead Air | ||||
| Dead Air Chapter Chronology | |||||
| |||||
- "What do you call 5,000 infected lawyers?"
- ―Zoey
- "The crane will lower that dumpster, then we can jump across"
- ―Francis
The Crane is the second chapter of the fourth campaign, Dead Air.
The Survivors start out from the safe room in the Harbor View Hotel's kitchen. They exit through the hotel's service dock and climb a fire escape to reach the hotel's upper floors and the hotel roof. In the first Crescendo Event of the Campaign, they activate the noisy crane which lowers a dumpster which enables them to cross over to a second and subsequent rooftops.
Thereafter they enter the first of two office buildings and make their way through open-plan office spaces and down the stairs to the street below where a safe house is found in a storage facility opposite.
This a relatively long and challenging chapter with manifold enemies, navigational twists and turns, tight combat spaces and side rooms to explore. Along the way they are likely to encounter a full variety of Special Infected including at least one Tank. For these reasons this chapter counts as one of the most high-risk experiences in the game for human Survivors.
Strategy
Also see: Tactics
All campaign walkthroughs are done on Normal difficulty in single player, and are meant to give tips on what to do and generally point out things that might otherwise be missed.
There are, of course, a few key things to always remember:
- Stop, look, and listen.
- Being observant might alert you to something nasty ahead of time, like a Witch, Special Infected or Tank, and allow you to prepare yourself.
- Teamwork.
- This cannot be stressed enough. Left 4 Dead is supposed to be a cooperative game. Communicate with your teammates, if you're playing with others, or if you're by yourself with the AI, point out things they might otherwise miss. In all cases, watch out for each other and take care of each other. You are not going to survive the zombie apocalypse by yourself.
- Be ready for anything.
- Don't panic.
Things are starting to heat up. Head back up to the rooftops, and keep your wits about you. Falling would be... such a shame.
Campaign
When starting from this chapter, the AI Survivors will grab:
- Bill will grab a submachine gun.
- Francis will grab a pump shotgun.
- Louis will grab a submachine gun.
- Zoey will grab a submachine gun.
When the Tier 2 weapons are found, they will grab:
- Bill will grab an assault rifle
- Francis will grab an auto shotgun
- Louis will grab an assault rifle
- Zoey will grab a hunting rifle
Otherwise, they will keep the weapons they had in the last chapter. (See The Greenhouse for a list of weapons they will grab there.) An important thing to remember is that this chapter is a long one, has one of the highest densities of Infected in the game and ammo caches are located at some distance from one another. Tier 2 weapon fire discipline and making maximum use of pistols and grenades will prevent a team being seriously embarrassed by ammo shortages at all-too-frequent critical moments.
The crane.
The Survivors start out in the hotel kitchen safe room where first-aid kits, tier 1 weapons, and ammo sit on a counter. If you're starting out here, grab some first aid and a weapon of your choice. If you started from the previous chapter, The Greenhouse, heal up and replenish your ammo.
Since there is a rather large and noticeable hole in the wall beside the safe room door it is possible to kill those Infected seen immediately outside the exit door. Once everyone is ready, open the door and head out in the usual way.
To The Hotel Roof
Outside the safe room is the hotel's service dock. A large number of loitering Infected must be dispatched before jumping over a fence with the help of a dirt pile. This fence is a non-return barrier and teams must ensure all members cross over in a co-ordinated way to avoid having someone incapacitated beyond reach of assistance. A pale green colored dumpster allows access to a vertical yellow ladder and an external fire escape. Care is needed at this point as The Director often spawns a Hunter, a Smoker or even a Boomer on this stairway.
The fire escape gives access to a hotel suite bathroom window. The bedroom contains a fairly messy bed on which can sometimes be found Tier 2 weaponry. The hotel corridor outside features numerous side rooms which usually contain supplies such as pills and grenades. Care is needed because this hallway is a very popular attack path for 'hurry-up' hordes and a full range of Special Infected, including a Tank. A Witch can either spawn directly in the corridor or in any of the side rooms.
Climbing one flight of stairs at the end of the hall brings players to residential suite with a window giving access to an adjacent rooftop. A table near the window is another possible location for a gift of tier 2 weapons.
Before progressing to operate the crane to lower the dumpster, it is sensible to take down any visible enemies. For example, the air conditioning structure to the front gives excellent lines of sight over adjoining rooftops. A good idea is to do whatever rooftop sniping is necessary using (e.g.) a Hunting Rifle and then return to the apartment building to switch weapons or pick up a fresh Tier 2 before moving onto the actions outlined in the following paragraph. Note that a Tank or Witch may spawn at some distance away on an neighboring rooftop during this curtain-raiser and being prepositioned on the air conditioning structure gives you ample opportunity to nix this threat with little risk. Bugging out back to the apartment building is a line of escape if the situation starts to get out of hand.
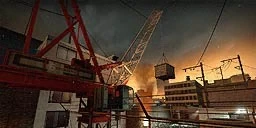
The Crane and Dumpster
An ominous crane looms nearby which a Survivor will provide a dialog prompt about in case there's any doubt. Operating the crane to lower a dumpster will trigger Dead Air's first Crescendo Event. To prepare for this event it is recommended to set out the gas cans found inside the crane enclosure at convenient and obvious choke points. One can at the fence entrance and a second next to the dumpster will work well. Once crane starts to operate its noise sets off the Crescendo Event. The Common Infected horde will always attack from in front (where the dumpster was standing. From time to time a secondary horde and a Boomer or Smoker will arrive from the hotel building players have recently traversed.
Tactics to combat this attack range from:
1. Holding position inside the crane enclosure, shooting down enemies as they appear and activating the gas cans. This is a generally successful tactic although it is likely that at least one team member will require assistance at some point.
2. Cramming the entire team up onto the crane platform where it shoots and melees to victory. This tactic renders the team invulnerable to Special Infected attack since they simply cannot access the team. A highly successful tactic.
The law office.
3. Set up the gas cans as appropriate, activate the crane and retreat to the hotel apartment overlooking the rooftop. Enemies can attack only via two tight chokepoints and the apartment doorway behind the team. A highly successful tactic.
Once the dumpster is down, the team can proceed to the next series of rooftops. Note that on arriving at the dumpster it is likely that a Smoker will be heard moving along on the roof above. If so, he will try to snag a team member from the high roof to the rear. His behavior is highly predictable and he is thus easy to shot down.
As an aside, the worst-case scenario involves a Tank spawning on the crane rooftop. The enclosing fence makes it particularly hard for players to evade and run-and-gun. If a player has a Molotov, now is the time to use it. Depending on where he spawns, players can engage him with long-range gunfire and even entice him onto a roof parapet where he might fall off the building to the ground below. Another good tactic is (3) above: retreat to the hotel apartment and cone him with concentrated fire from the window.
The next section means working across two large open roof areas with a fair number of loitering Common Infected. Since the next ammo resupply is some distance away, it is recommended that strict Tier 2 fire discipline be maintained. Pistol use should be maximized.
Skipping Crane Crescendo Event
There is way of skipping this Crescendo Event. To do this you have to go inside of the crane area. Jump onto the wooden crate with the two gas cans on top. From there, jump onto the round exhaust vent. Then you jump on top of the gate. Follow it down until you reach the end gate leading to the edge of the roof. You're then going to jump across onto the metal box on the other building. Once you land on it, jump again onto the roof and there you have skipped the Crescendo Event. Be careful when jumping across. Should you land wrong, you will hang off the metal box and you won't be able to be rescued, unless you have other people playing with you. (Note: This is only available to players who have newly gotten Left 4 Dead. There is an update patch to close this alternate path).
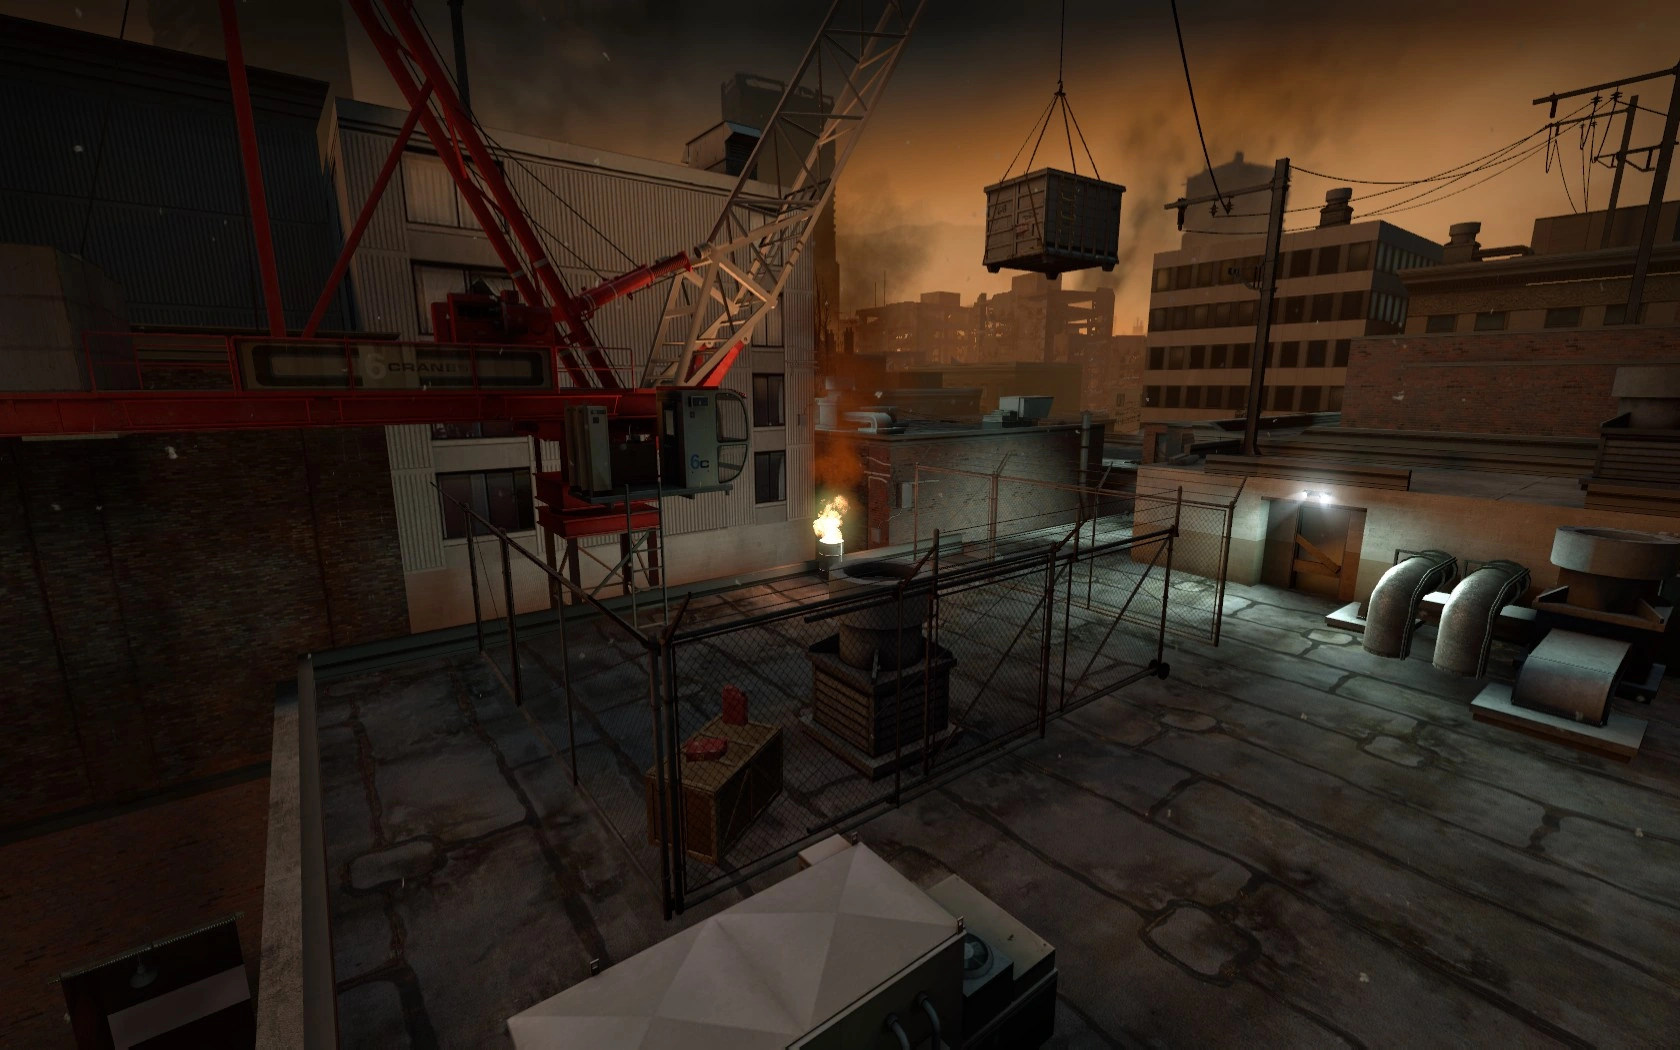
The Lawyers' Office Building and Cube Farm
The first rooftop is a large one dotted around with air conditioning housings. Teams simply need to sweep across and take a bridge across the gap to an adjacent rooftop to gain access to the lawyer's office building.
There are numerous Infected on both roofs and Smokers, a Witch and even a Tank may be expected to spawn during this stage.
Teams have a choice of two windows to enter the lawyers' office building and need to proceed to the senior partner's luxurious office. Side rooms should be checked for supplies as a matter of course. A hurry-up horde is likely to spawn from behind when the team enters the law office.
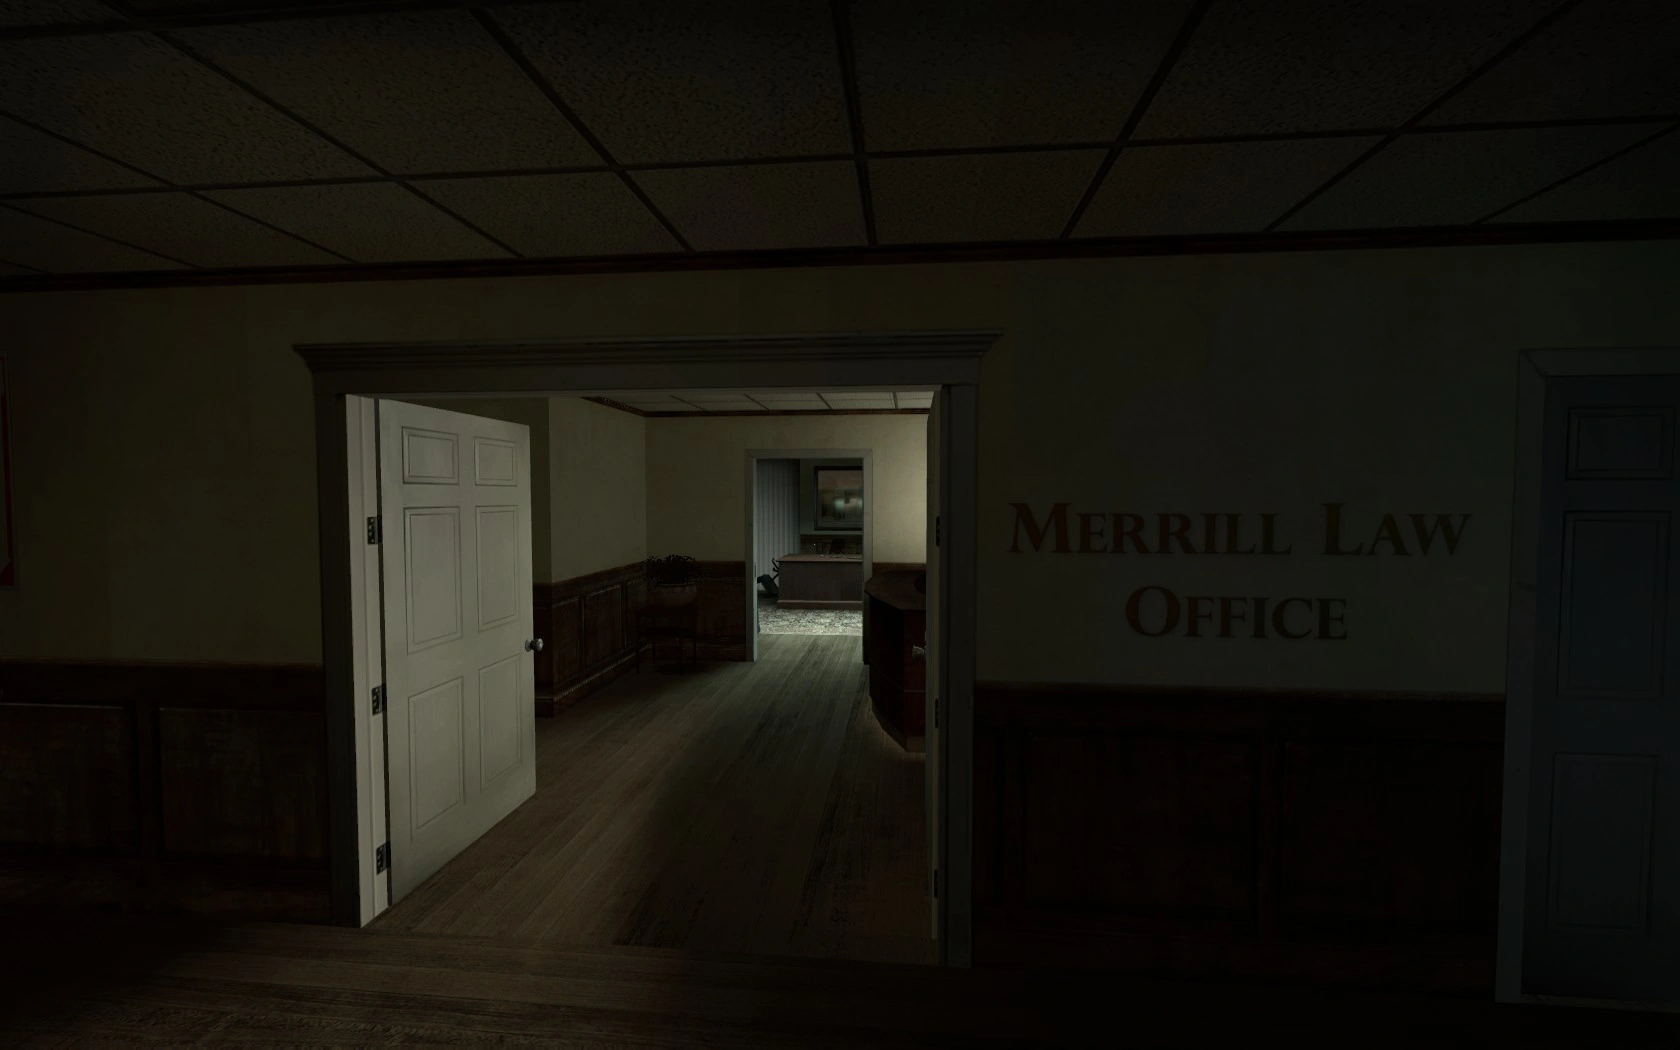
Quitting the law firm, teams enter the next building over a plank bridge. This is a multi-floor office building characterized by worker cubicals and a large number of enclosed office spaces which need to be searched and cleared. A resource room with a first aid station is the re-supply point for the team's final push and contains an ammo pile and replacement Tier 2 weapons (look around the corner near the piles of photocopy paper).
Internal stairs bring teams to the first of two cube farms which are densely populated with a mix of alert and passive Common Infected. The sudden appearance of these office cubicals will sometimes prompt Zoey to ask Louis: "Hey Louis, all these cubicles make you homesick?"
Despite what Louis may feel about these offices, they are a mixed blessing. The cubicles give the Infected obstacles to climb over and can slow them down during an attack. Plus, the many side rooms on these two floors can contain pills. On the downside, these two floors of cube farms are highly likely places for a Tank or a Witch to spawn. If teams have yet to encounter a Tank there is a need to be extremely wary. At least one Smoker will attempt to sneak up from the rear and will often snag a team member; the good news is that the victim will invariably not be dragged too far on account of the office cubicles blocking his pull.
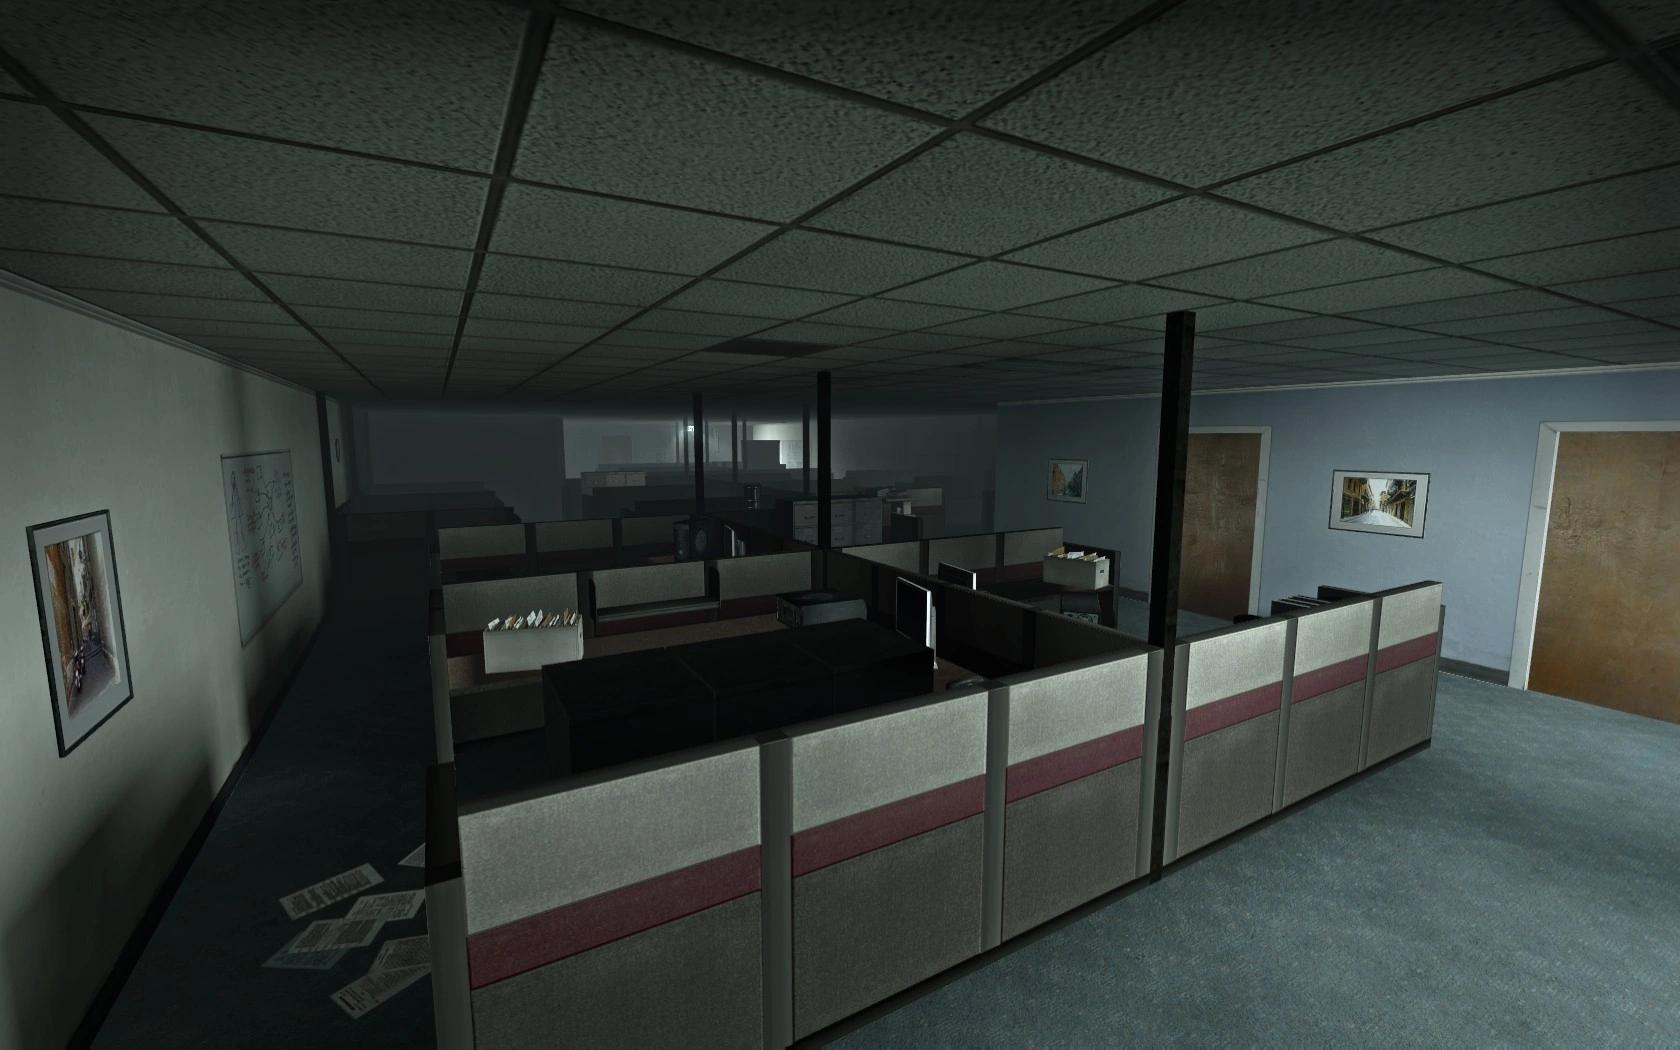
The offices.
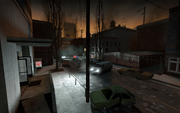
Once teams reach the ground floor it will be seen that the street outside is thickly popluated with Common Infected who block access to the storage facility containing the safe room. A sound tactic is to thow a Pipe Bomb from the office building doorway and charge to safety once it has exploded.
However teams must expect a last challenge or two before the end: a Witch can spawn in the street or even right outside the safe room door; a Tank might appear; or a stray shot can set off an alarmed car opposite the safe room building.
Good job, you made it through this chapter! Take a breath, and get ready for The Construction Site.
Left 4 Dead 2 Version
The map uses the Versus version from Left 4 Dead even on co-op modes, meaning the chain-link fence that once protected the Survivors surrounding the crane during the crescendo event has now been mostly removed, and a small building was added to provide cover for the Infected. This makes holding out near the crane an extremely dangerous place since Tanks and Chargers can easily knock Survivors down to their doom. In addition to the changes already present in the Versus version, the fridge right outside the safe house no longer has a door, obviously to keep players from camping inside and waiting for a crescendo to cease. One chainlink fence around the crane was re-added, between the crane and the dumpster, and the car alarm can no longer be activated early from the rooftops to remove the threat from a more advantageous position. The car will appear to have no alarm at first, but will flash its lights once the Survivors are on the street to signify that the alarm is on. The trailer on the street next to the safe house was moved away from the rooftop area, thus preventing Survivors from skipping the rest of the map entirely.

Outside of the offices.
Versus
The Survivors
Now that humans are controlling the Special Infected, things can only get harder. However, they can't spawn until you leave the safe room. That doesn't mean that you should let them have a good chance to find just the right spot, though! Hurry up and get your supplies, and get running!
Throughout the level, keep in mind that you are playing against human players. They will not wait for you to come to them, and if they do, it's because they have an ambush location that could be deadly to you and your team. With this in mind, you need to keep moving. However, moving blindly could be your downfall—move quickly, but with caution.
The Crescendo Event at the crane will be either the hardest part of the level or the easiest. Remember that in Versus, your melee is limited so you cannot properly use the crane platform tactic. However, having the entire team up there will be helpful as you can generally see where you've placed the gas cans and you'll be able to kill most Infected before they reach you. The Smoker is your primary concern here, if you hear the trademark cough of the Smoker, don't be afraid to melee a few times. You may end up saving a teammate from being dragged into the horde or even fire.
Rooftops in general are a concern as you can simply be dragged off on to the edge of a roof and you'll be left to dangle unless your team can help you. Otherwise, in this state, you are entirely helpless. Strategic Hunters can actually take out an entire team of Survivors in one pounce. If you are unlucky enough to have a Tank on a rooftop, he'll be difficult to deal with. Finally, Boomers can rain vomit down on you from higher buildings. In short, stay away from rooftop edges!
Remain vigilant for Witch cries. If you spot a Boomer not moving in the distance and staring you down while the Witch can be heard—don't shoot! If he moves away or towards you, then you can safely assume he's not concealing a Witch. Witches, although avoidable, can be the fatal blow to the Survivors especially if there are competent Special Infected lying in wait.
As with all levels, when you know you're near the safe room, make sure you are with your teammates before you make a dash for it. If you make a break for it alone, it is not unlikely that a Hunter will be waiting for your arrival and possibly kill you before the others can reach you. No one can survive the infection alone. Teamwork is essential.
The Infected
See also: The Boomer, The Hunter, The Smoker, The Tank
Though they might be immune to the Infection, they aren't immune to death; no one is. Work together to make sure they're victims of this rampant virus, one way or another.
Overall Tips
- Any survivors that choose to run ahead of or fall behind their teammates will be much easier to seriously damage and kill. The farther away they are from their teammates, the more likely they are to be incapacitated or die before their teammates can reach them.
- The Survivors all have outlines around them, showing their status and location. Green means they're healthy. Yellow means they're hurt. Red means they're low on health. Purple means they've been covered in Boomer bile. You can probably discern which to seek out first if possible.
- Think like a Survivor. When you play as one, when are the worst times that something could come at you? Exploit that knowledge.
- Teamwork, as aforementioned. Has a Boomer gotten their bile all over the Survivors? Jump one of them or a clean one. They can't see their teammates' aura until they're clean...and by then, it might be too late.
- As much as teamwork is a strength for you and your enemies, a lack of it will be their downfall. If you can focus all of your energy on killing one of the Survivors, the rest will be that much easier to take down. Not only will they have one less gun, but they will have three Survivors to your three incapacitating Infected.
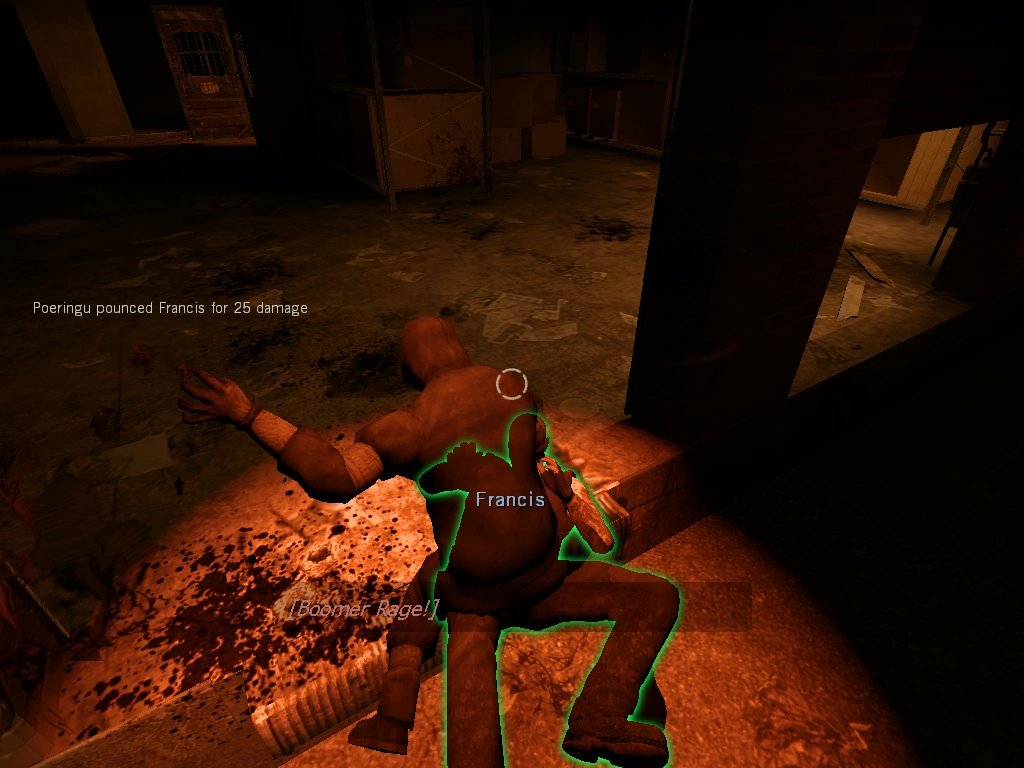
Boomers: This level was made for you. You are the sneaky one, hiding around corners and in dark rooms. You stalk your victims, wait for them to be distracted, then—attack! Vomit spews in their direction, they scream rants of anger as they back into defensive positions; waiting to embrace the force of your approaching horde. The interiors of this level are perfect for Boomer ambushes. There are many rooms and corners that the Survivors must pass on their journey. If a Tank shows up, do your best to cover as many Survivors as you can. A horde and a Tank at one time is often enough to overwhelm the Survivors. Although rooftops aren't your forte, go for it! If you can cover the Survivors while other Infected are in position, Smokers and Hunters can use the opportunity you created to put the hurt on the Survivors. There's a Witch? Conceal her! Odds are that one genius Survivor is going to shoot you and the Witch in one go.
Hunters: Although you've found better pounce locations in Riverside and Fairfield, this is a good level for you. Nearby rooftops are perfect for the accurate Hunters, and close corridors are good for the not-so-accurate Hunters. Just remember, pounce lone Survivors, not a group! Inversely, a group that is foolish enough to gather around a rooftop edge can all be eliminated with one pounce. By pouncing one, the others will stumble backwards and over the edge—effectively incapacitating them all! As with the Boomer, a Witch is a true blessing. Crouch behind or in front of her. Watch as Survivors spot you and either shoot you, inadvertently startling the Witch; or they'll wait and slowly form a plan, giving other Infected time to set up. If one macho Survivor decides that they're the "big man with the shotgun, " prove them wrong. In fact, pounce them wrong! They'll attempt to kill you and the Witch with headshots in which case you pounce him as he gets close. This will in turn startle the Witch. Although this is frowned upon frequently, at the beginning of this level, a Hunter can go up to the rooftop with the crane and use the flaming barrel to light themselves on fire. Then, if you jump on top of the gas cans, you will light them on fire, and destroy them before the Survivors get the chance to use them in defense. This will, however, inevitably kill your Hunter.
Smokers: The time to clash with the Survivors has returned. But unlike your Hunter, Boomer or Tank brethren, you do not charge in an attack. You do not fight in close quarters. No, you are certainly unique. You are the long range attacker. Stick to the rooftop shadows, pull the last Survivor to enter that building. Pull the one who is near the edge. In short, you are necessary for the Infected victory in this level. Working with the Boomer, pull one of the four slimed Survivors or alternatively, pull a clean one and separate the group. Stay back on the roofs and wait for the opportune moment. See those wooden plank crossings? They are your best friend. As Survivors cross, tug one on to the edge. Witches are your even greater friends. Use them to your advantage. Drag Survivors into her. Sure, she'll nag you about it after wards, but at that point she'll be too angry with the Survivor you just gave her.
Tanks: Is it the Hulk? Is it a steroid-junkie? No, silly! It's a Tank! There are times that call for a Smoker, there are times that call for a Hunter and there are even times that call for Boomers. You're in luck, Mr. Tank, as it's always a good time for the Infected when a Tank shows up. If a Survivor is constricted or pounced, do not attempt to "help" the Smoker or Hunter. Your attack will free them and kill your buddy in the case of the Hunter. You may end up saving the Survivor's life. Avoid fire! Tank no like fire, Tank like crushing Survivor skulls! Memorize which Survivor has a Molotov before becoming the Tank. Be wary of them. Also, it is important to note that incapacitated Survivors should be left alone if more are still standing. If a Survivor shows teamwork and cooperation by helping their friend up, show them the error of their ways. Work with your fellow Infected, lead them in times of doubt and above all, don't underestimate a well aimed rock-throw! You may be spawn in the roof with the crane. Punch the Survivors so they will all be hanging for their lives.
Survival
See also: Survival Mode
The crane has been started, but there's no crate for it to lower. The crane will continue to hum and attract the hordes. How long can the Survivors hold out?
Overall Tips
- Teamwork is essential to long-term survival.
- In this mode, most of the popular choke points, closets and easily defensible corners are removed. Even if you find one that has not been removed, it is not recommended that you fight from there as The Tank will quickly defeat you when he arrives.
- You have an infinite amount of time to prepare. Use this to your advantage. Take as much time as you need to set up gas cans, propane tanks, oxygen tanks, and to find a good place to fight from.
- When searching for a place to fight from, remember that you need a location that not only limits where the horde attacks from, but also gives you a fair chance against the Tank. You either need to be able to fall back and deal with the Tank easily, or have a good enough vantage point to kill him before he can get too close.
- Ammunition is a problem. Unless you are being overrun with Infected or fighting a Tank, try to use your pistols as much as possible. Conserving ammunition should be a priority, as trying to get more during a horde attack can often be fatal. When you do head out for ammunition, remember to take at least one teammate with you.
Secret Ledge Method
- Under the crane on the side of the building, there is a small ledge that juts out and runs along the side of the roof. If you slowly edge your way over and on to the ledge without falling off, it can work as a defensible position. The Common Infected will only come at you from the other side of the crane and the only Special Infected you need to watch out for are the Smokers. Whilst on this ledge, Hunters seem to have extreme trouble trying to pounce you. So much trouble, that they will often leave themselves out in the open and growl at you. The Tank will also have trouble getting you here. The worst that can happen is that he will try to throw a rock at you. If this happens, take cover behind the ladder in front of you, or the fence further back nearer the corner. Often, Tanks will simply find their way down into the alleyway below you and spend the entire round trying futilely to attack you. Your only concern is the Smoker. Up to three of them can spawn at once. They will not be able to pull you back onto the roof, however, they can constrict you and that is why it is recommended to perform this trick with at least one other person.
Crane Controls Method
- Up on the actual crane itself where you start, the attack from is a viable place to make a stand. Set up your defenses and start the round, you won't even need to move; you're already in place! From there, the entire team can shoot or melee through the hordes of Infected easily. That is, until the Tank arrives. When he does, if all four or at least three Survivors concentrate their fire on him, he should die before he gets to you; otherwise, it's time to abandon the crane. Getting stuck up there with a Tank is not a good idea.
Truck Exploit
- It is possible to access the ground level of the map by falling off the ledge onto the truck on the side of the building furthest from the crane. The first player runs off the edge holding their Jump Button, so as not to grab onto the ledge when they fall, and falls onto the truck, where they will be incapacitated. The next player does the same, only this time holding their Action aimed at the incapacitated player on the way down. If executed successfully, the player will slow down in the air, taking almost no damage, simultaneously reviving the player on the truck. A third player can then join them. The first two then jump off the front of the truck towards the "Give Blood" bus stop, jumping forward as far as possible, as the ground around the truck will kill the player almost instantly from any height. The fourth player, still on the roof, can hit the crane switch and fall onto the truck, where the player waiting for him will help him up. These two can then jump down, and all four can hide in the corner of the map, out of range of all zombies. There is also a long hallway to hide down, as the occasional zombie will find its way down without dying.
Notes
- Just outside of the safe room is a small room with a large metal door. This door is entirely invulnerable to any kind of damage. That applies to hordes, Tanks, Witches and all other Infected. This room can be an extremely useful exploit. In the event of a Tank appearing soon after leaving the safe room (such as the hallway after climbing the ladder), one person can lead it into the room, run out (or die, whichever is more convenient) and someone can close the door, ending the Tank's reign of terror. It is rather ironic that this door is actually stronger than the starting door of the "safe room." It does not appear in Left 4 Dead 2
- From the roof, it is possible to shoot the alarmed car and set it off. Later, when you pass the car, you will get an on-screen message saying "Watch out! Some cars set off alarms..." However, if you try to trigger it, nothing will happen.
- If you have very high health, and you run and jump into the tree next to the alarmed car from the second building after the crescendo event, it is possible to survive without being incapacitated. If you then take pills or heal yourself, you can jump onto the bus stop shelter, and onto the ground, skipping the entire office part of the chapter.
- In Survival Mode, if the player stays where they are on the building when the Tank comes, because he usually spawns in the building in front of you, if you watch him, he will constantly climb in and out of the window and sometimes throw rocks at it. The only way to stop him from doing this is to toss a Molotov or shoot him. When the next Tank comes, he will do the same thing.


