No edit summary Tags: Visual edit apiedit |
m (typos fixed: For example → For example,, the the → the (2)) |
||
| (9 intermediate revisions by 7 users not shown) | |||
| Line 9: | Line 9: | ||
'''The Alleys''' is the first chapter in the abbreviated two-chapter [[Crash Course]] campaign and takes place at night, immediately following the [[Rooftop Finale]] in [[No Mercy]]. The rescue pilot complained of feeling unwell and began to turn into an [[Infected]] in mid-flight. Although Zoey had the quickness of mind to shoot him in time, her action resulted in the helicopter crashing in an industrial area located in [[Whitney County]] just outside the city of [[Fairfield]]. |
'''The Alleys''' is the first chapter in the abbreviated two-chapter [[Crash Course]] campaign and takes place at night, immediately following the [[Rooftop Finale]] in [[No Mercy]]. The rescue pilot complained of feeling unwell and began to turn into an [[Infected]] in mid-flight. Although Zoey had the quickness of mind to shoot him in time, her action resulted in the helicopter crashing in an industrial area located in [[Whitney County]] just outside the city of [[Fairfield]]. |
||
| − | Once [[the Survivors]] regroup after the crash, they track through a network of industrial back-alleys, passing storage buildings and factories until they reach the main road network. They arrive at [[Riverside]] Boulevard with access to a [[Whitney County Bridge|barricaded bridge]] set up by the [[military]]. |
+ | Once [[the Survivors]] regroup after the crash, they track through a network of industrial back-alleys, passing storage buildings and factories until they reach the main road network. They arrive at [[Riverside]] Boulevard with access to a [[Whitney County Bridge|barricaded bridge]] set up by the [[military]]. Firing an abandoned towed howitzer on the bridge's approach road allows the Survivors to destroy the barricade. The Survivors cross the bridge and drop down to a warehouse on the right containing a [[safe room]]. |
| − | ==Strategy== |
+ | == Strategy == |
{{Keystrategy|The Survivors helicopter crashed. Now they have to find a way to get out of that town. Again!}} |
{{Keystrategy|The Survivors helicopter crashed. Now they have to find a way to get out of that town. Again!}} |
||
| − | ===Campaign=== |
+ | === Campaign === |
When starting from this chapter, the AI Survivors will usually grab: |
When starting from this chapter, the AI Survivors will usually grab: |
||
* '''[[Bill]]''' will grab a ''[[Pump Shotgun]]''. |
* '''[[Bill]]''' will grab a ''[[Pump Shotgun]]''. |
||
| Line 22: | Line 22: | ||
When the [[Weapons#Tier 2|Tier 2]] weapons are found, they will grab: |
When the [[Weapons#Tier 2|Tier 2]] weapons are found, they will grab: |
||
| − | *'''Bill''' will grab an ''[[Assault Rifle]]''. |
+ | * '''Bill''' will grab an ''[[Assault Rifle]]''. |
| − | *'''Francis''' will grab an ''[[Auto Shotgun]]''. |
+ | * '''Francis''' will grab an ''[[Auto Shotgun]]''. |
| − | *'''Louis''' will grab an ''[[Assault Rifle]]''. |
+ | * '''Louis''' will grab an ''[[Assault Rifle]]''. |
| − | *'''Zoey''' will grab a ''[[Hunting Rifle]]''. |
+ | * '''Zoey''' will grab a ''[[Hunting Rifle]]''. |
| − | Unlike most ''Left 4 Dead'' campaigns, weapons do not spawn in groups, hence it is only possible to find one such weapon at any one time. For example a player may find an Auto Shotgun but the usual co-located Assault Rifles or Hunting Rifles will be absent. Survivor bots will always take a new Tier 2 weapon unless they are already holding their preferred Tier 2 weapon. Consequently, if playing as a single player it is sometimes preferable to retain a Tier 1 weapon until a better Tier 2 option becomes available. |
+ | Unlike most ''Left 4 Dead'' campaigns, weapons do not spawn in groups, hence it is only possible to find one such weapon at any one time. For example, a player may find an Auto Shotgun but the usual co-located Assault Rifles or Hunting Rifles will be absent. Survivor bots will always take a new Tier 2 weapon unless they are already holding their preferred Tier 2 weapon. Consequently, if playing as a single player it is sometimes preferable to retain a Tier 1 weapon until a better Tier 2 option becomes available. Players start with a standard Tier 1 weapon selection of a pump action shotgun or sub-machine gun. |
From the starting point next to the crashed helicopter, there are three options open: |
From the starting point next to the crashed helicopter, there are three options open: |
||
| Line 32: | Line 32: | ||
# Turn left down the alley and proceed with the campaign. |
# Turn left down the alley and proceed with the campaign. |
||
# Check the warehouse (two floors: basement and ground level) in front for items like grenades, a second pistol and [[pain pills]]. |
# Check the warehouse (two floors: basement and ground level) in front for items like grenades, a second pistol and [[pain pills]]. |
||
| − | # Check out a small room in a building to the right for supplies. |
+ | # Check out a small room in a building to the right for supplies. Sometimes door is blocked since the [[AI Director]] can choose which room to barricade. If it is decided to check that room, ''do not shoot'' the propane tanks that usually spawn next to the dumpsters, as the resulting explosion will push the dumpsters and block the entrance, trapping Survivors inside. |
| − | [[File:Screenshot_412828057_1254813384.jpg|thumb|left|The start of the campaign]] |
+ | [[File:Screenshot_412828057_1254813384.jpg|thumb|left|The start of the campaign]] |
| + | Choosing option 1 is usually quicker and limits the risk of horde attacks, especially on Expert. However, options 2 and 3 are intrinsically interesting and add grenades and other assets to the players' resources. |
||
| − | Once in the alley, players should be alert for a Tank or Witch plus the usual mix of opposition: Common Infected horde, Boomer, Hunter and Smoker. An adjoining pair of rooms to the left can sometimes spawn a second pistol. |
+ | Once in the alley, players should be alert for a Tank or Witch plus the usual mix of opposition: Common Infected horde, Boomer, Hunter and Smoker. An adjoining pair of rooms to the left can sometimes spawn a second pistol. At least one [[gas can]] can invariably be found in the car-port opposite on the right. |
A semi-truck and trailer blocks the alley and forces players to mount a short flight of steps and turn left into a large warehouse. |
A semi-truck and trailer blocks the alley and forces players to mount a short flight of steps and turn left into a large warehouse. |
||
| − | As you enter, a door to the right may or not be blocked and may contain items. Scour the warehouse for supplies, grenades and a second pistol as they sometimes spawn in plain sight. |
+ | As you enter, a door to the right may or not be blocked and may contain items. Scour the warehouse for supplies, grenades and a second pistol as they sometimes spawn in plain sight. |
| − | Be warned that Special Infected have a nasty habit of exploiting the rooftop skylight. Smokers will constrict a teammate from up there and Boomers can either vomit from above or simply dive down and explode on all four Survivors. In Expert, it is sometimes wise to unload your pistols or your primary weapon (if you don't mind losing some ammo) onto the ceiling if you hear a Special Infected spawning. |
+ | Be warned that Special Infected have a nasty habit of exploiting the rooftop skylight. Smokers will constrict a teammate from up there and Boomers can either vomit from above or simply dive down and explode on all four Survivors. In Expert, it is sometimes wise to unload your pistols or your primary weapon (if you don't mind losing some ammo) onto the ceiling if you hear a Special Infected spawning. |
| − | Once you are done, move on to the warehouse's exit on the left. |
+ | Once you are done, move on to the warehouse's exit on the left. Note that the warehouse's loading dock overlooking the alley's continuation forms a Non-Return barrier at this point. |
| − | The alley below is usually heavily populated with Common Infected. |
+ | The alley below is usually heavily populated with Common Infected. This area is also a favorite spawning ground for a Tank or a Witch. Ideally all players should drop down to the ground floor together to avoid potential problems posed by the aforementioned Non-Return attribute. |
| − | Once all Survivors exit the warehouse, it is a good idea to go straight ahead down a dark alley because a Tier 2 weapon may spawn in the panel truck located there. |
+ | Once all Survivors exit the warehouse, it is a good idea to go straight ahead down a dark alley because a Tier 2 weapon may spawn in the panel truck located there. |
| − | Back in the main route, a garage to the left may contain Tier 2 weapons or an ammo pile or other supplies. |
+ | Back in the main route, a garage to the left may contain Tier 2 weapons or an ammo pile or other supplies. Move on forward and the path will divide. Players can take the path into the building on the left or move on forward to a city street. It matters little which route is taken since players end up at the same destination. |
| − | A parking lot on the right behind a chain-link fence is worth exploring because it may contain Tier 2 weapons or throwables. |
+ | A parking lot on the right behind a chain-link fence is worth exploring because it may contain Tier 2 weapons or throwables. |
| − | Down the end of the street is a lighted building on the left with two entrances. |
+ | Down the end of the street is a lighted building on the left with two entrances. Players can turn right down an alley (checking the back of the truck there for supplies) or they can go straight down the street to the most visible and obvious doorway. A Tier 2 weapon or an ammo pile may spawn next to the corpse at the street door along with a propane tank. A magazine rack inside the door will voice-trigger Zoey's "Latest edition of Hating Everything Magazine" line. This building may spawn throwables or pills. |
| − | Players can exit |
+ | Players can exit the building via the window or a back exit offering pills, throwables or a second pistol. |
| − | [[File:Screenshot_1233435857_1254813384.jpg|thumb|left|Exiting the warehouse]] |
+ | [[File:Screenshot_1233435857_1254813384.jpg|thumb|left|Exiting the warehouse]] |
| + | Outside under the railroad bridge is a high-danger area for a Tank or Witch and a "hurry-up" horde. Turn right and pass under the bridge. An ammo pile will always spawn near the Army truck and occasionally, Tier 2 weapons as well. |
||
| − | Continue around the train wreck, taking care because of the alarmed car and walk straight ahead to a high ledge overlooking the river, a bridge and river-side street. |
+ | Continue around the train wreck, taking care because of the alarmed car and walk straight ahead to a high ledge overlooking the river, a bridge and river-side street. Along the way to this point, a room on the left may contain supplies. |
| − | + | Take the stairs or jump down onto the truck. It is recommended that everyone do this simultaneously because a Smoker can snag a tardy player. Explore the immediate area for supplies as a second pistol, throwables, ammo piles or pills may spawn on the street or in the back of vehicles. A Tank or a Witch may also spawn in the river-side street. |
|
| + | |||
| + | Proceed under the road bridge to a warehouse facility which will contain supplies and Tier 2 weapons before crossing the street and climbing a partially-collapsed embankment to the road bridge level. An army truck and howitzer designate a keynote point on this map. |
||
| + | |||
| + | An ammo pile will always spawn next to the howitzer and occasionally Tier 2 weaponry. Gas Cans tend to spawn on the army truck equipped with a Minigun. A search of the nearby two-roomed building will turn up Tier 2 weapons, gas bottles and other supplies. Players can lay out these explosives, rearm and heal, prepping themselves for the upcoming Crescendo Event. |
||
| + | |||
| + | A Witch may spawn near the howitzer and it may be necessary to kill her to avoid startling her in the middle of the Crescendo Event: the Minigun can be used for this purpose and for mopping up any stray infected loitering on the barricaded bridge abutment. |
||
| + | |||
| + | All during this time Zoey's character will typically urge players to "fire that gun" in order to clear the bridge barricade. |
||
There are two ways to handle the Crescendo Event. |
There are two ways to handle the Crescendo Event. |
||
| − | # |
+ | # Climb on the truck and have each player cover a defensive arc while one team-member uses the Minigun. This is doable with AIs as they will usually climb up onto the truck and cooperate. Well-placed gas cans can eliminate the majority of the Horde and Special Infected foolish enough to stand within it. Combat risks: the Horde will come in all directions and the Minigun has a limited traverse; AI players have a bad habit of stepping into the Minigun's arc of fire; Smokers can snag a Survivor from the undergrowth; Boomers have a habit of hiding within the nearby trees, attacking only when no one is looking; Hunters, though not really a huge problem, will sometimes rush in and claw instead of pouncing, especially on Expert. |
| − | # |
+ | # Camp within the nearby building. All four Survivors stand in the corners and eliminate the Horde as they come in through the narrow entrances. Make full use of explosives and grenades to cover these choke-points. Smokers and Boomers pose a problem, they can grab or vomit on Survivors through the windows and holes in the wall. Hunters are less of a problem except on Expert when they will sometimes blend in with the Horde and attack with their claws. |
| − | Once the |
+ | Once the barricade is destroyed by fire, proceed onto the bridge. An ambulance may contain pills or even first aid kits, (except on Expert). Walk through the mass of vehicles there and keep an ear our for a Witch or Tank as they sometimes spawn. A Tank spawn is generally more dangerous due to the vehicle obstructions. |
| + | A panel truck may contain items, a second pistol or Tier 2 weapons. |
||
| ⚫ | |||
| ⚫ | The map is unchanged apart from weapon and enemy profiles. It is notable that, as this campaign was released during L4D2's development, it already had several L4D2-style randomised map elements even |
||
| + | Special Infected tend to spawn behind the bus near the bridge's far end. |
||
| ⚫ | |||
| + | |||
| ⚫ | |||
| + | Once the overhead Riverside sign comes into view, players turn right and leave the bridge by dropping down a treed abutment. At some point a character will offer a "safe room" voice-prompt. move down the hill to your right. |
||
| + | |||
| + | Players can either go straight to the safe room inside the well-lit warehouse or check the building to the left for grenades, pills or a second pistol. |
||
| + | |||
| + | Note that a Tank or a Witch occasionally spawns right outside the safe room door. |
||
| + | |||
| ⚫ | |||
| ⚫ | |||
| + | |||
| ⚫ | |||
| + | |||
| ⚫ | |||
{{Infectstrategy |
{{Infectstrategy |
||
|Though they might be immune to [[the Infection]], they aren't immune to death; no one is. Work together to make sure they're victims of this rampant virus, one way or another.}} |
|Though they might be immune to [[the Infection]], they aren't immune to death; no one is. Work together to make sure they're victims of this rampant virus, one way or another.}} |
||
| + | [[File:Left-4-dead-crash-course-20090929045939638_640w.jpg|thumb|A Boomer waiting behind the Howitzer]] |
||
| ⚫ | '''Boomers''': There are numerous areas in The Alleys in which Boomers can lurk undetected. Some of these areas include the dark shadowy portions of the rooms found in the first alley with the empty-moving van. If a Boomer manages to spawn and crouch inside the dark patches of the small hardware room beside the truck, he/she can go completely unnoticed by human-controlled Survivors often mistaking the camouflaged Boomer as a black trash bag until the Survivor finds the time to examine the dark spot. Another useful strategy for human-controlled Boomers would be to mislead survivors by breaking the last or second skylight panel in the warehouse but refrain from unloading your bile. Once the Survivors find the shattered panel as a false alarm, try vomiting on them from the open skylight that you consider the least expected opening above the warehouse or simply leap down from the open skylight panel that had been already passed by the Survivors as being secure and catch the group off guard. Another more common method would be to camp in the Witch's spawning area(s) in order to vomit on Survivors too reluctant to crown the Witch. If that is not possible, simply "use the Witch as a hostage" by standing close to her making your explosion as a trigger to startle her. Another useful strategy would be to camp on the bridge above the Survivors prior to the finale and vomit on them as they pass by. |
||
| ⚫ | '''Smoker''': The Alleys is mostly outdoors and with the area being littered with accessible rooftops, Smokers can take advantage of it to attack the Survivors without getting killed swiftly. Several dark areas could help you hide, though it should not be relied on entirely as the tell-tale signs of a Smoker will always give you away. Target lone or rear Survivors to force their teammates to rush back. If a Boomer managed to puke on all four Survivors, take advantage of it by pulling one of them, earning you an achievement in the process. Capitalize on any Witches that spawned by hiding behind objects or in dark areas before pulling a Survivor towards the Witch. Other than that, there are several situations where a Smoker can be very deadly. At the warehouse, if the Survivors already went through and left, they cannot climb back up. By pulling the last Survivor, it will almost be a guaranteed kill unless you are in the line of sight of the other Survivors. If a Hunter is with you, however, he can pounce your victim after you are killed. This can also be done while on the roof of the warehouse as the skylight can be broken, though it requires a direct line of sight to the Survivors. It is not recommended however as the Smoker's tongue is exposed. After the train wreck, the Survivors have to climb down a ladder or truck to the lower level. You can cause serious damage in two different ways. By spawning on the lower level first, you can pull the first Survivor you see, causing them to fall and receive falling damage. On several positions, the Survivor will hang there instead. This tactic, however, will make you an open target so you can get killed pretty quickly. The other method is to spawn behind the Survivors and wait for three of them to climb down. Pull the last Survivor, forcing the rest to climb back up to help their teammate. If done from a rooftop, you may not be an easy target. With a Hunter buddy, he can pounce any Survivors trying to save your victim, causing even more damage. During the Crescendo Event, if a Survivor strayed near the fire, you can spawn on the other side and pull him/her towards the fire, causing major damage and quite possibly killing him/her as the fire takes a long time to be extinguished. |
||
| ⚫ | |||
| + | [[File:Left-4-dead-crash-course-20090929045941856_640w.jpg|thumb|left|A Hunter hiding on a warehouse roof]] |
||
| ⚫ | '''Smoker''': The Alleys is mostly outdoors and with the area being littered with accessible rooftops, Smokers can take advantage of it to attack the Survivors without getting killed swiftly. Several dark areas could help you hide, though it should not be relied on entirely as |
||
| ⚫ | '''Hunters''': ''The Alleys'' is by far the best section to put human-controlled Hunters skills to the test. The first narrow alley is extremely useful for Hunters to practice and demonstrate their "wall-jumping" skills/techniques. If a group of skilled Hunters have mastered all possible techniques for pouncing on Survivors in the beginning portion of the level, they could gain make themselves into potential threats to the Survivors' trek. Halfway through the level past the warehouse, the [[Witch]] has a tendency to spawn around that area. Hunters can use this to their advantage by performing a technique already known to many long term players of the game as the, "Witch barrier". This technique mainly involves harboring as many of the Human-controlled Hunters as possible around the Witch but avoid crouching down to charge your jumps until the Survivors' body profiles are within line of sight since the Hunter will begin to growl and ruin the element of surprise. Once the Survivors are irritably close to the Witch's personal space, have all of the Hunters charge at any survivor they find as being a safe and clear pounce. Also, try to pounce once the Witch has been startled. |
||
| ⚫ | '''Tank''': A Tank randomly spawns in ''The Alleys'' but the most common spawn points are before reaching the bridge or while the Survivors are crossing it. There are many cars, dumpsters, and forklifts that can be thrown at the Survivors, so use this as your advantage. This is one opportunity to get the 20 cars pile-up achievement (dumpsters work as well). It's much easier to win before the Survivors reach the bridge since they are usually carrying a pump shotgun or submachine gun; other than that, the Tank uses the same tactics in the other campaigns. Try to avoid climbing certain areas like the van that the Survivors have to climb down since it will give them plenty of time to shoot and run. The Survivors will also attempt to stun you with propane tanks and pipe bombs since most people will try to get the Tank stumble [[Achievements|achievement]] or burn you with molotovs since it will slow the Tank down. The Tank mostly appears about two times throughout the level. |
||
| ⚫ | ''' |
||
| ⚫ | |||
| ⚫ | '''Tank''': A Tank randomly spawns in ''The Alleys'' but the most common spawn points are before reaching the bridge or while the Survivors are crossing it. There are many cars, dumpsters, and forklifts that can be thrown at the Survivors, so use this as your advantage. This |
||
| ⚫ | |||
| − | |||
| + | [[File:Left-4-dead-crash-course-20090929045946497_640w.jpg|thumb|A bad ending to a survival match]] |
||
| ⚫ | |||
| ⚫ | {{Survivalstrategy|The Survivors fired the Howitzer. But that shot wasn't strong enough to break down the barricade and now endless hordes of Infected are coming. How long can The Survivors hold out?}} |
||
'''Table Method''' |
'''Table Method''' |
||
| − | :Near the place where pipe bombs, pills and molotovs are found, there is a room with a table. The Survivors have to stand on or be near the table. To make this method work, three Survivors should grab [[auto shotgun]]s and one Survivor an [[assault rifle]] to protect them from Smokers. |
+ | : Near the place where pipe bombs, pills and molotovs are found, there is a room with a table. The Survivors have to stand on or be near the table. To make this method work, three Survivors should grab [[auto shotgun]]s and one Survivor an [[assault rifle]] to protect them from Smokers. |
| − | :'''Note''': The wall near the hummer can be broken by the Infected. |
+ | : '''Note''': The wall near the hummer can be broken by the Infected. |
'''Shelf Method''' |
'''Shelf Method''' |
||
| − | :In the room adjacent to the one above there should be a single shelf in the corner of the room, Have two survivors stand on the shelf with assault rifles, and the others against or near the shelf with auto shotguns or assault rifles. When the Tank comes either go out into the open and fight him, or have the two on the ground lead him a merry dance around the room. There are weapons right in front of the shelf, two [[pipe bomb]]s and six molotovs on the shelf, and some pills in the adjacent room, so supply runs should be rare. Finally, the vent to the right of the shelf will be used by Special Infected. |
+ | : In the room adjacent to the one above there should be a single shelf in the corner of the room, Have two survivors stand on the shelf with assault rifles, and the others against or near the shelf with auto shotguns or assault rifles. When the Tank comes either go out into the open and fight him, or have the two on the ground lead him a merry dance around the room. There are weapons right in front of the shelf, two [[pipe bomb]]s and six molotovs on the shelf, and some pills in the adjacent room, so supply runs should be rare. Finally, the vent to the right of the shelf will be used by Special Infected. |
| − | :'''Note: '''This works with A.I. |
+ | : '''Note: '''This works with A.I. |
| − | ==Easter eggs== |
+ | == Easter eggs == |
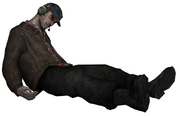
| + | [[File:deadpilot_1.png|thumb|right|Dead Helicopter Pilot]] |
||
| − | * |
+ | * The Chopper Pilot's body can be found directly behind the starting point of this chapter. Each Survivor will comment on how [[Zoey]] shot him, except for Bill since his character did not receive any new dialogue for Crash Course. |
| − | * |
+ | * An off ramp sign for Riverside appears on the bridge (see gallery for picture). A large church steeple can be seen in the distance. This hints at the Church the Survivors come across next in [[Death Toll]]. [[Louis]] or [[Zoey]] may pass comment about going to Riverside. |
| − | * After exiting the first warehouse, there is a building across the street, in which is a broken wall with a burst pipe excreting copious amounts of steam. When standing by this, the Survivors will comment if steam is alright and they will comment if they love steam. This is a reference to Steam, being the online platform for ''Left 4 Dead'' and ''Left 4 Dead 2''. |
||
| + | * In a building located across the street from the first warehouse is a broken wall with a burst pipe emitting copious amounts of steam. A similar visual effect appears in the Mercy Hospital campaign and characters may repeat their lines warning about steam pipes and "I love steam". This is a reference to Steam, an online game platform developed by Valve, the same company who developed L4D franchise and many more games. |
||
| − | ==Notes== |
+ | == Notes == |
[[File:Graffiti_alleys_06.png|thumb|right|Warehouse Office Graffiti]] |
[[File:Graffiti_alleys_06.png|thumb|right|Warehouse Office Graffiti]] |
||
* The PC players get a new menu screen at the site of the fallen helicopter of ''The Alleys''. However, the menu screen is completely unchanged for 360 players. |
* The PC players get a new menu screen at the site of the fallen helicopter of ''The Alleys''. However, the menu screen is completely unchanged for 360 players. |
||
| − | * It is possible that this level |
+ | * It is possible that this level was a test of a revised Director's abilities for ''[[Left 4 Dead 2]]. ''with alarmed cars, accessible doorways and weapon spawning in different locations. |
| − | * There is a glitch in this level at the Howitzer-Crescendo |
+ | * There is a rare glitch in this level at the Howitzer-Crescendo. Sometimes no Infected appear when the cannon is fired and players can proceed across the bridge once the barricade burns down. |
* Standing in front of the Howitzer when it is firing does not inflict any damage to [[Survivors]] or [[Special Infected]]. |
* Standing in front of the Howitzer when it is firing does not inflict any damage to [[Survivors]] or [[Special Infected]]. |
||
| − | * |
+ | * It is possible to run through the fire created by the Howitzer and reach the other side before the flames die down. However the Survivor must have a high health rating or risk getting incapacitated. Taking pills while on fire will assist with this exploit and are essential when playing on Expert. |
| − | * |
+ | * A [[Hersch Shipping Company|Hersch Shipping]] warehouse will trigger Francis' "little brown shorts" dialog. |
| − | ==Gallery== |
+ | == Gallery == |
<gallery captionalign="left"> |
<gallery captionalign="left"> |
||
L4d garage01 alleys0004.png|The Alley |
L4d garage01 alleys0004.png|The Alley |
||
| Line 128: | Line 152: | ||
{{Campaigns|Crash Course}} |
{{Campaigns|Crash Course}} |
||
| + | |||
| + | [[ru:Переулки]] |
||
[[Category:Crash Course]] |
[[Category:Crash Course]] |
||
[[Category:Left 4 Dead]] |
[[Category:Left 4 Dead]] |
||
Revision as of 01:10, 4 March 2019
| |||||
| Chapter 1 The Alleys | |||||
| Campaign | Crash Course | ||||
| Crash Course Chapter Chronology | |||||
| |||||
- "Okay, important safety tip: Don't get in a helicopter with a zombie pilot."
- ―Zoey
- "Hey Zoey, here's the pilot, in case you wanna shoot him again."
- ―Francis
The Alleys is the first chapter in the abbreviated two-chapter Crash Course campaign and takes place at night, immediately following the Rooftop Finale in No Mercy. The rescue pilot complained of feeling unwell and began to turn into an Infected in mid-flight. Although Zoey had the quickness of mind to shoot him in time, her action resulted in the helicopter crashing in an industrial area located in Whitney County just outside the city of Fairfield.
Once the Survivors regroup after the crash, they track through a network of industrial back-alleys, passing storage buildings and factories until they reach the main road network. They arrive at Riverside Boulevard with access to a barricaded bridge set up by the military. Firing an abandoned towed howitzer on the bridge's approach road allows the Survivors to destroy the barricade. The Survivors cross the bridge and drop down to a warehouse on the right containing a safe room.
Strategy
Also see: Tactics
All campaign walkthroughs are done on Normal difficulty in single player, and are meant to give tips on what to do and generally point out things that might otherwise be missed.
There are, of course, a few key things to always remember:
- Stop, look, and listen.
- Being observant might alert you to something nasty ahead of time, like a Witch, Special Infected or Tank, and allow you to prepare yourself.
- Teamwork.
- This cannot be stressed enough. Left 4 Dead is supposed to be a cooperative game. Communicate with your teammates, if you're playing with others, or if you're by yourself with the AI, point out things they might otherwise miss. In all cases, watch out for each other and take care of each other. You are not going to survive the zombie apocalypse by yourself.
- Be ready for anything.
- Don't panic.
The Survivors helicopter crashed. Now they have to find a way to get out of that town. Again!
Campaign
When starting from this chapter, the AI Survivors will usually grab:
- Bill will grab a Pump Shotgun.
- Francis will grab a Pump Shotgun.
- Louis will grab a Submachine Gun.
- Zoey will grab a Submachine Gun.
When the Tier 2 weapons are found, they will grab:
- Bill will grab an Assault Rifle.
- Francis will grab an Auto Shotgun.
- Louis will grab an Assault Rifle.
- Zoey will grab a Hunting Rifle.
Unlike most Left 4 Dead campaigns, weapons do not spawn in groups, hence it is only possible to find one such weapon at any one time. For example, a player may find an Auto Shotgun but the usual co-located Assault Rifles or Hunting Rifles will be absent. Survivor bots will always take a new Tier 2 weapon unless they are already holding their preferred Tier 2 weapon. Consequently, if playing as a single player it is sometimes preferable to retain a Tier 1 weapon until a better Tier 2 option becomes available. Players start with a standard Tier 1 weapon selection of a pump action shotgun or sub-machine gun.
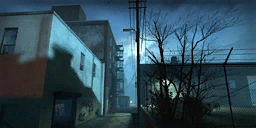
From the starting point next to the crashed helicopter, there are three options open:
- Turn left down the alley and proceed with the campaign.
- Check the warehouse (two floors: basement and ground level) in front for items like grenades, a second pistol and pain pills.
- Check out a small room in a building to the right for supplies. Sometimes door is blocked since the AI Director can choose which room to barricade. If it is decided to check that room, do not shoot the propane tanks that usually spawn next to the dumpsters, as the resulting explosion will push the dumpsters and block the entrance, trapping Survivors inside.

The start of the campaign
Choosing option 1 is usually quicker and limits the risk of horde attacks, especially on Expert. However, options 2 and 3 are intrinsically interesting and add grenades and other assets to the players' resources.
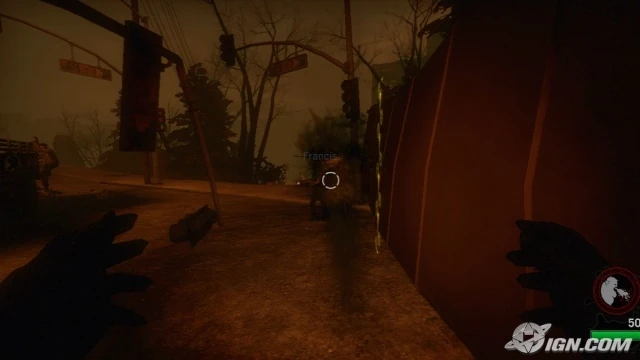
Once in the alley, players should be alert for a Tank or Witch plus the usual mix of opposition: Common Infected horde, Boomer, Hunter and Smoker. An adjoining pair of rooms to the left can sometimes spawn a second pistol. At least one gas can can invariably be found in the car-port opposite on the right.
A semi-truck and trailer blocks the alley and forces players to mount a short flight of steps and turn left into a large warehouse.
As you enter, a door to the right may or not be blocked and may contain items. Scour the warehouse for supplies, grenades and a second pistol as they sometimes spawn in plain sight.
Be warned that Special Infected have a nasty habit of exploiting the rooftop skylight. Smokers will constrict a teammate from up there and Boomers can either vomit from above or simply dive down and explode on all four Survivors. In Expert, it is sometimes wise to unload your pistols or your primary weapon (if you don't mind losing some ammo) onto the ceiling if you hear a Special Infected spawning.
Once you are done, move on to the warehouse's exit on the left. Note that the warehouse's loading dock overlooking the alley's continuation forms a Non-Return barrier at this point.
The alley below is usually heavily populated with Common Infected. This area is also a favorite spawning ground for a Tank or a Witch. Ideally all players should drop down to the ground floor together to avoid potential problems posed by the aforementioned Non-Return attribute.
Once all Survivors exit the warehouse, it is a good idea to go straight ahead down a dark alley because a Tier 2 weapon may spawn in the panel truck located there.
Back in the main route, a garage to the left may contain Tier 2 weapons or an ammo pile or other supplies. Move on forward and the path will divide. Players can take the path into the building on the left or move on forward to a city street. It matters little which route is taken since players end up at the same destination.
A parking lot on the right behind a chain-link fence is worth exploring because it may contain Tier 2 weapons or throwables.
Down the end of the street is a lighted building on the left with two entrances. Players can turn right down an alley (checking the back of the truck there for supplies) or they can go straight down the street to the most visible and obvious doorway. A Tier 2 weapon or an ammo pile may spawn next to the corpse at the street door along with a propane tank. A magazine rack inside the door will voice-trigger Zoey's "Latest edition of Hating Everything Magazine" line. This building may spawn throwables or pills.
Players can exit the building via the window or a back exit offering pills, throwables or a second pistol.
Exiting the warehouse
Outside under the railroad bridge is a high-danger area for a Tank or Witch and a "hurry-up" horde. Turn right and pass under the bridge. An ammo pile will always spawn near the Army truck and occasionally, Tier 2 weapons as well.
Continue around the train wreck, taking care because of the alarmed car and walk straight ahead to a high ledge overlooking the river, a bridge and river-side street. Along the way to this point, a room on the left may contain supplies.
Take the stairs or jump down onto the truck. It is recommended that everyone do this simultaneously because a Smoker can snag a tardy player. Explore the immediate area for supplies as a second pistol, throwables, ammo piles or pills may spawn on the street or in the back of vehicles. A Tank or a Witch may also spawn in the river-side street.
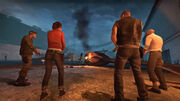
Proceed under the road bridge to a warehouse facility which will contain supplies and Tier 2 weapons before crossing the street and climbing a partially-collapsed embankment to the road bridge level. An army truck and howitzer designate a keynote point on this map.
An ammo pile will always spawn next to the howitzer and occasionally Tier 2 weaponry. Gas Cans tend to spawn on the army truck equipped with a Minigun. A search of the nearby two-roomed building will turn up Tier 2 weapons, gas bottles and other supplies. Players can lay out these explosives, rearm and heal, prepping themselves for the upcoming Crescendo Event.
A Witch may spawn near the howitzer and it may be necessary to kill her to avoid startling her in the middle of the Crescendo Event: the Minigun can be used for this purpose and for mopping up any stray infected loitering on the barricaded bridge abutment.
All during this time Zoey's character will typically urge players to "fire that gun" in order to clear the bridge barricade.
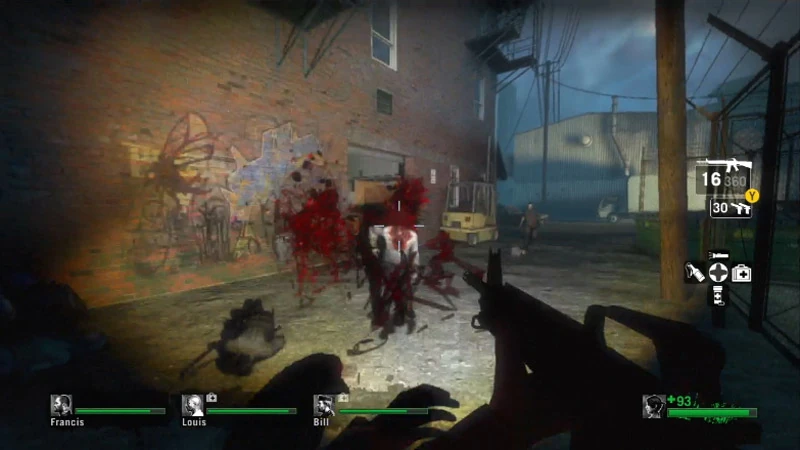
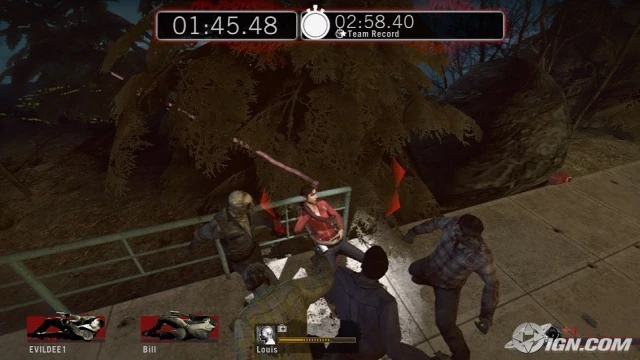
There are two ways to handle the Crescendo Event.
- Climb on the truck and have each player cover a defensive arc while one team-member uses the Minigun. This is doable with AIs as they will usually climb up onto the truck and cooperate. Well-placed gas cans can eliminate the majority of the Horde and Special Infected foolish enough to stand within it. Combat risks: the Horde will come in all directions and the Minigun has a limited traverse; AI players have a bad habit of stepping into the Minigun's arc of fire; Smokers can snag a Survivor from the undergrowth; Boomers have a habit of hiding within the nearby trees, attacking only when no one is looking; Hunters, though not really a huge problem, will sometimes rush in and claw instead of pouncing, especially on Expert.
- Camp within the nearby building. All four Survivors stand in the corners and eliminate the Horde as they come in through the narrow entrances. Make full use of explosives and grenades to cover these choke-points. Smokers and Boomers pose a problem, they can grab or vomit on Survivors through the windows and holes in the wall. Hunters are less of a problem except on Expert when they will sometimes blend in with the Horde and attack with their claws.
Once the barricade is destroyed by fire, proceed onto the bridge. An ambulance may contain pills or even first aid kits, (except on Expert). Walk through the mass of vehicles there and keep an ear our for a Witch or Tank as they sometimes spawn. A Tank spawn is generally more dangerous due to the vehicle obstructions.
A panel truck may contain items, a second pistol or Tier 2 weapons.
Special Infected tend to spawn behind the bus near the bridge's far end.
Once the overhead Riverside sign comes into view, players turn right and leave the bridge by dropping down a treed abutment. At some point a character will offer a "safe room" voice-prompt. move down the hill to your right.
Players can either go straight to the safe room inside the well-lit warehouse or check the building to the left for grenades, pills or a second pistol.
Note that a Tank or a Witch occasionally spawns right outside the safe room door.
Left 4 Dead 2 Version
The map is unchanged apart from weapon and enemy profiles. It is notable that, as this campaign was released during L4D2's development, it already had several L4D2-style randomised map elements even on the L4D1 version, such as the alarmed cars and open side rooms being different each play.
Versus
The Infected
See also: The Boomer, The Hunter, The Smoker, The Tank
Though they might be immune to the Infection, they aren't immune to death; no one is. Work together to make sure they're victims of this rampant virus, one way or another.
Overall Tips
- Any survivors that choose to run ahead of or fall behind their teammates will be much easier to seriously damage and kill. The farther away they are from their teammates, the more likely they are to be incapacitated or die before their teammates can reach them.
- The Survivors all have outlines around them, showing their status and location. Green means they're healthy. Yellow means they're hurt. Red means they're low on health. Purple means they've been covered in Boomer bile. You can probably discern which to seek out first if possible.
- Think like a Survivor. When you play as one, when are the worst times that something could come at you? Exploit that knowledge.
- Teamwork, as aforementioned. Has a Boomer gotten their bile all over the Survivors? Jump one of them or a clean one. They can't see their teammates' aura until they're clean...and by then, it might be too late.
- As much as teamwork is a strength for you and your enemies, a lack of it will be their downfall. If you can focus all of your energy on killing one of the Survivors, the rest will be that much easier to take down. Not only will they have one less gun, but they will have three Survivors to your three incapacitating Infected.
A Boomer waiting behind the Howitzer
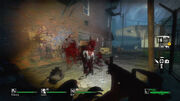
Boomers: There are numerous areas in The Alleys in which Boomers can lurk undetected. Some of these areas include the dark shadowy portions of the rooms found in the first alley with the empty-moving van. If a Boomer manages to spawn and crouch inside the dark patches of the small hardware room beside the truck, he/she can go completely unnoticed by human-controlled Survivors often mistaking the camouflaged Boomer as a black trash bag until the Survivor finds the time to examine the dark spot. Another useful strategy for human-controlled Boomers would be to mislead survivors by breaking the last or second skylight panel in the warehouse but refrain from unloading your bile. Once the Survivors find the shattered panel as a false alarm, try vomiting on them from the open skylight that you consider the least expected opening above the warehouse or simply leap down from the open skylight panel that had been already passed by the Survivors as being secure and catch the group off guard. Another more common method would be to camp in the Witch's spawning area(s) in order to vomit on Survivors too reluctant to crown the Witch. If that is not possible, simply "use the Witch as a hostage" by standing close to her making your explosion as a trigger to startle her. Another useful strategy would be to camp on the bridge above the Survivors prior to the finale and vomit on them as they pass by.
Smoker: The Alleys is mostly outdoors and with the area being littered with accessible rooftops, Smokers can take advantage of it to attack the Survivors without getting killed swiftly. Several dark areas could help you hide, though it should not be relied on entirely as the tell-tale signs of a Smoker will always give you away. Target lone or rear Survivors to force their teammates to rush back. If a Boomer managed to puke on all four Survivors, take advantage of it by pulling one of them, earning you an achievement in the process. Capitalize on any Witches that spawned by hiding behind objects or in dark areas before pulling a Survivor towards the Witch. Other than that, there are several situations where a Smoker can be very deadly. At the warehouse, if the Survivors already went through and left, they cannot climb back up. By pulling the last Survivor, it will almost be a guaranteed kill unless you are in the line of sight of the other Survivors. If a Hunter is with you, however, he can pounce your victim after you are killed. This can also be done while on the roof of the warehouse as the skylight can be broken, though it requires a direct line of sight to the Survivors. It is not recommended however as the Smoker's tongue is exposed. After the train wreck, the Survivors have to climb down a ladder or truck to the lower level. You can cause serious damage in two different ways. By spawning on the lower level first, you can pull the first Survivor you see, causing them to fall and receive falling damage. On several positions, the Survivor will hang there instead. This tactic, however, will make you an open target so you can get killed pretty quickly. The other method is to spawn behind the Survivors and wait for three of them to climb down. Pull the last Survivor, forcing the rest to climb back up to help their teammate. If done from a rooftop, you may not be an easy target. With a Hunter buddy, he can pounce any Survivors trying to save your victim, causing even more damage. During the Crescendo Event, if a Survivor strayed near the fire, you can spawn on the other side and pull him/her towards the fire, causing major damage and quite possibly killing him/her as the fire takes a long time to be extinguished.


A Hunter hiding on a warehouse roof
Hunters: The Alleys is by far the best section to put human-controlled Hunters skills to the test. The first narrow alley is extremely useful for Hunters to practice and demonstrate their "wall-jumping" skills/techniques. If a group of skilled Hunters have mastered all possible techniques for pouncing on Survivors in the beginning portion of the level, they could gain make themselves into potential threats to the Survivors' trek. Halfway through the level past the warehouse, the Witch has a tendency to spawn around that area. Hunters can use this to their advantage by performing a technique already known to many long term players of the game as the, "Witch barrier". This technique mainly involves harboring as many of the Human-controlled Hunters as possible around the Witch but avoid crouching down to charge your jumps until the Survivors' body profiles are within line of sight since the Hunter will begin to growl and ruin the element of surprise. Once the Survivors are irritably close to the Witch's personal space, have all of the Hunters charge at any survivor they find as being a safe and clear pounce. Also, try to pounce once the Witch has been startled.
Tank: A Tank randomly spawns in The Alleys but the most common spawn points are before reaching the bridge or while the Survivors are crossing it. There are many cars, dumpsters, and forklifts that can be thrown at the Survivors, so use this as your advantage. This is one opportunity to get the 20 cars pile-up achievement (dumpsters work as well). It's much easier to win before the Survivors reach the bridge since they are usually carrying a pump shotgun or submachine gun; other than that, the Tank uses the same tactics in the other campaigns. Try to avoid climbing certain areas like the van that the Survivors have to climb down since it will give them plenty of time to shoot and run. The Survivors will also attempt to stun you with propane tanks and pipe bombs since most people will try to get the Tank stumble achievement or burn you with molotovs since it will slow the Tank down. The Tank mostly appears about two times throughout the level.
Survival
See also: Survival Mode
The Survivors fired the Howitzer. But that shot wasn't strong enough to break down the barricade and now endless hordes of Infected are coming. How long can The Survivors hold out?
Overall Tips
- Teamwork is essential to long-term survival.
- In this mode, most of the popular choke points, closets and easily defensible corners are removed. Even if you find one that has not been removed, it is not recommended that you fight from there as The Tank will quickly defeat you when he arrives.
- You have an infinite amount of time to prepare. Use this to your advantage. Take as much time as you need to set up gas cans, propane tanks, oxygen tanks, and to find a good place to fight from.
- When searching for a place to fight from, remember that you need a location that not only limits where the horde attacks from, but also gives you a fair chance against the Tank. You either need to be able to fall back and deal with the Tank easily, or have a good enough vantage point to kill him before he can get too close.
- Ammunition is a problem. Unless you are being overrun with Infected or fighting a Tank, try to use your pistols as much as possible. Conserving ammunition should be a priority, as trying to get more during a horde attack can often be fatal. When you do head out for ammunition, remember to take at least one teammate with you.
A bad ending to a survival match
Table Method
- Near the place where pipe bombs, pills and molotovs are found, there is a room with a table. The Survivors have to stand on or be near the table. To make this method work, three Survivors should grab auto shotguns and one Survivor an assault rifle to protect them from Smokers.
- Note: The wall near the hummer can be broken by the Infected.
Shelf Method
- In the room adjacent to the one above there should be a single shelf in the corner of the room, Have two survivors stand on the shelf with assault rifles, and the others against or near the shelf with auto shotguns or assault rifles. When the Tank comes either go out into the open and fight him, or have the two on the ground lead him a merry dance around the room. There are weapons right in front of the shelf, two pipe bombs and six molotovs on the shelf, and some pills in the adjacent room, so supply runs should be rare. Finally, the vent to the right of the shelf will be used by Special Infected.
- Note: This works with A.I.
Easter eggs

Dead Helicopter Pilot
- The Chopper Pilot's body can be found directly behind the starting point of this chapter. Each Survivor will comment on how Zoey shot him, except for Bill since his character did not receive any new dialogue for Crash Course.
- An off ramp sign for Riverside appears on the bridge (see gallery for picture). A large church steeple can be seen in the distance. This hints at the Church the Survivors come across next in Death Toll. Louis or Zoey may pass comment about going to Riverside.
- In a building located across the street from the first warehouse is a broken wall with a burst pipe emitting copious amounts of steam. A similar visual effect appears in the Mercy Hospital campaign and characters may repeat their lines warning about steam pipes and "I love steam". This is a reference to Steam, an online game platform developed by Valve, the same company who developed L4D franchise and many more games.
Notes
Warehouse Office Graffiti
- The PC players get a new menu screen at the site of the fallen helicopter of The Alleys. However, the menu screen is completely unchanged for 360 players.
- It is possible that this level was a test of a revised Director's abilities for Left 4 Dead 2. with alarmed cars, accessible doorways and weapon spawning in different locations.
- There is a rare glitch in this level at the Howitzer-Crescendo. Sometimes no Infected appear when the cannon is fired and players can proceed across the bridge once the barricade burns down.
- Standing in front of the Howitzer when it is firing does not inflict any damage to Survivors or Special Infected.
- It is possible to run through the fire created by the Howitzer and reach the other side before the flames die down. However the Survivor must have a high health rating or risk getting incapacitated. Taking pills while on fire will assist with this exploit and are essential when playing on Expert.
- A Hersch Shipping warehouse will trigger Francis' "little brown shorts" dialog.
Gallery
")
")
")
")
")
")
")
")
")
")
")


