Deathhacker (talk | contribs) (→Notes) |
m (corrections) |
||
| (29 intermediate revisions by 19 users not shown) | |||
| Line 1: | Line 1: | ||
{{Test}} |
{{Test}} |
||
{{Infobox weapon |
{{Infobox weapon |
||
| − | + | |image = Explosive Barrel.png |
|
| − | + | |icon = Explosive Barrel HUD invert.png |
|
| ⚫ | |||
| − | | icon = Explosive_Barrel_HUD_invert.png |
||
| ⚫ | |||
| ⚫ | |||
| − | | capacity = |
||
| − | | carrycapacity = |
||
| ⚫ | |||
| − | | rate = |
||
}} |
}} |
||
| + | The '''Explosive Barrel''' is a static game object which was released in [[The Sacrifice]] [[DLC]]. |
||
| + | It has an explosive effect that is a combination of the [[gas can]] and the [[propane tank]]. It is immobile and thus requires careful consideration during gameplay. Explosive Barrels are usually found either in side-by-side pairs or individual barrels in close proximity to one another. |
||
| − | The '''Explosive Barrel''' was released within [[The Sacrifice]] DLC and has an effect that is a combination of the [[Gas Can]] and the [[Propane Tank]]. However it is almost completely stationary making it tedious to strategize with. Usually found in pairs, and when shot, one barrel will explode and spread a large radius of fire. The other barrel will be blasted a few feet away making the fire spread even further out. |
||
| ⚫ | |||
| ⚫ | |||
| ⚫ | |||
| ⚫ | |||
| ⚫ | |||
| ⚫ | |||
| ⚫ | |||
| + | When triggered, they have three damage effects: an immediate proximity blast (as per the mentioned propane tank), enduring flame (as per the gas can) and that of shrapnel whereby the barrel's remains are thrown into the air in a random direction. The area affected by two Explosive Barrels bursting is considerable and players must maintain a safe distance when these devices are set off. A particular risk is a random shot accidentally striking an Explosive Barrel when a team member is within the danger zone. |
||
| ⚫ | |||
| − | == |
+ | ==[[Tactics]]== |
| ⚫ | |||
| ⚫ | |||
| − | === |
+ | ===[[Survivor]] Tactics=== |
| ⚫ | |||
| ⚫ | |||
| ⚫ | |||
| ⚫ | *If one or two Survivors are incapacitated next to |
||
| + | [[File:2011-08-13 00003.jpg|thumb|300px|Barrel explosion]] |
||
| ⚫ | |||
| ⚫ | |||
| ⚫ | |||
| ⚫ | |||
| − | * The associated achievement is recorded in favour of flame damage and not by the explosion itself. |
||
| ⚫ | |||
| − | * This achievement is easier to obtain in Left 4 Dead 2 instead of Left 4 Dead, since Chargers can be easily lured into charging into the barrels, and a single explosion should be able to kill it without the bots interfering. It can be similarly done with Hunters, however it is more risky and if you get pounced the hunter will likely be killed by your teammates or bots. |
||
| ⚫ | *If one or two Survivors are incapacitated next to an Explosive barrel, do your team a favor and stand next to it. Other Survivor players are very likely to shoot you when they see you and when they do, there is a great possibility that the barrel near you will be shot as well, making it explode and dealing damage to any Survivors near it, including the incapacitated Survivors. Be careful, though, because if the players already know your tactic, they will likely be wise enough not to do it and kill you later. So it is likewise suggested to cover or hide the barrels if possible from their sight so that they won't be aware of your "big surprise." Take note, though, this will almost certainly kill you either way, so only attempt this if you feel that the risk is worth the reward. |
||
| ⚫ | |||
| ⚫ | |||
| ⚫ | |||
| ⚫ | |||
| ⚫ | |||
| ⚫ | |||
| ⚫ | |||
| + | Note: It's possible to obtain the ''TOWERING INFERNO'' and ''BURN THE WITCH'' achievements with the fire from Explosive barrels as well, but the ''BARREL ROLLED'' achievement is the only one directly connected with the use of Explosive barrels. In theory, if infected walk into the fire after the initial explosion, it will also count towards the ''101 CREMATIONS'' achievement; in practice, the explosion damage usually kills nearby Infected before this occurs. |
||
| + | |||
| ⚫ | |||
| ⚫ | |||
| ⚫ | |||
| + | * [[The Spitter]]'s acid attacks do not corrode the barrel nor will they detonate it. |
||
| + | ** No Infected can cause it to explode on their own. It must be triggered via gunfire, flames, or explosions. |
||
| + | ** [[The Boomer]]'s explosion can detonate the barrel, however, despite the Boomer's explosion being unable to harm survivors directly. |
||
| − | {{clr}} |
||
{{Weapons}} |
{{Weapons}} |
||
| + | |||
| + | <!-- Interwikis --> |
||
| + | [[ru:Взрывоопасная бочка]] |
||
| + | [[Category:Left 4 Dead]] |
||
| + | [[Category:Left 4 Dead 2]] |
||
Revision as of 19:13, 12 July 2020

|
"What if just your beard starts to turn?" This article requires testing. You can help Left 4 Dead Wiki by experimenting with gameplay, and then changing it. |
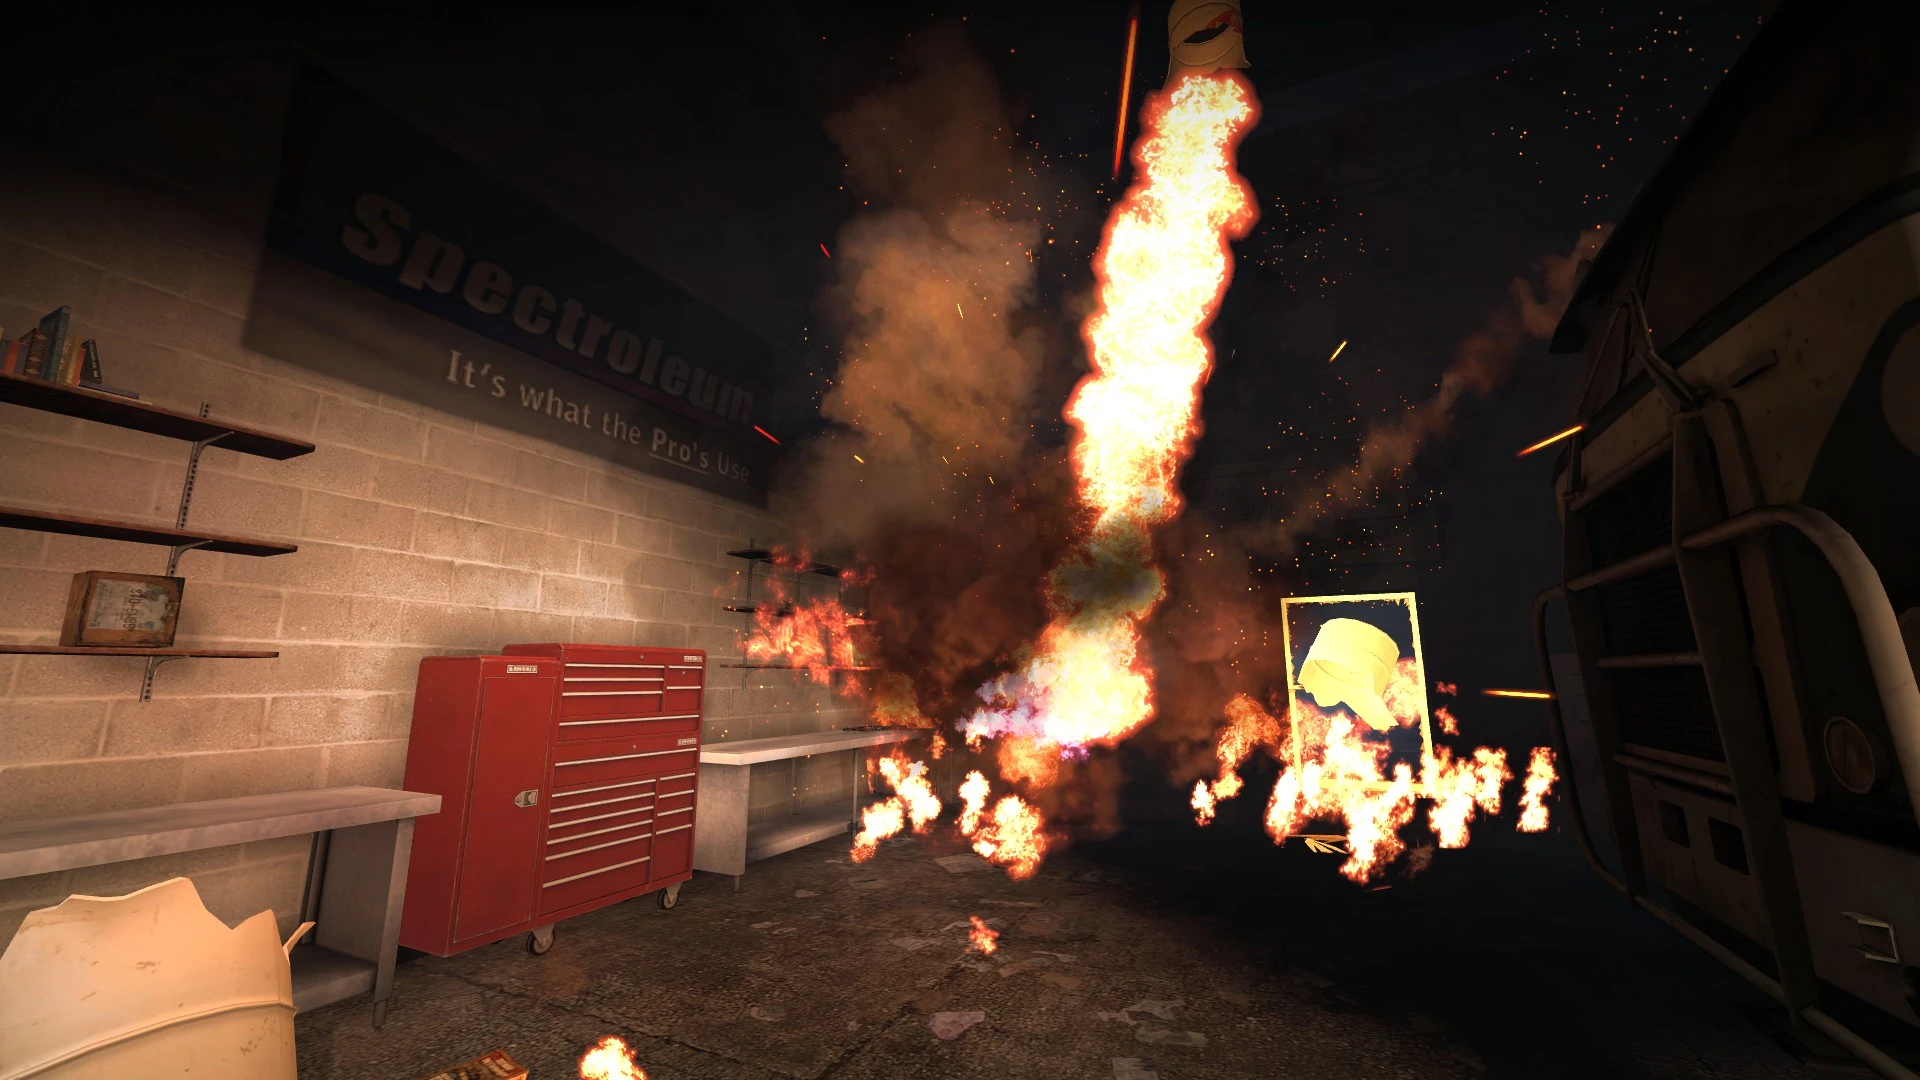
The Explosive Barrel is a static game object which was released in The Sacrifice DLC.
It has an explosive effect that is a combination of the gas can and the propane tank. It is immobile and thus requires careful consideration during gameplay. Explosive Barrels are usually found either in side-by-side pairs or individual barrels in close proximity to one another.
When triggered, they have three damage effects: an immediate proximity blast (as per the mentioned propane tank), enduring flame (as per the gas can) and that of shrapnel whereby the barrel's remains are thrown into the air in a random direction. The area affected by two Explosive Barrels bursting is considerable and players must maintain a safe distance when these devices are set off. A particular risk is a random shot accidentally striking an Explosive Barrel when a team member is within the danger zone.
Tactics
Survivor Tactics
- The barrels contain a highly explosive mix of propane and gas and should always be shot from beyond a minimum safe distance. Watch out for the flying shrapnel though, as it may land next to Survivors and spreads fire over the area.
- Explosive barrels can decimate Hordes and inflict severe immediate explosion and subsequent fire damage on Tanks.
Barrel explosion
Infected Tactics
- Try to incapacitate Survivors near the barrels, as their teammates are likely to hit the dangerous devices while trying to kill you and the fire and explosion will deal some extra damage to the Survivor.
- If one or two Survivors are incapacitated next to an Explosive barrel, do your team a favor and stand next to it. Other Survivor players are very likely to shoot you when they see you and when they do, there is a great possibility that the barrel near you will be shot as well, making it explode and dealing damage to any Survivors near it, including the incapacitated Survivors. Be careful, though, because if the players already know your tactic, they will likely be wise enough not to do it and kill you later. So it is likewise suggested to cover or hide the barrels if possible from their sight so that they won't be aware of your "big surprise." Take note, though, this will almost certainly kill you either way, so only attempt this if you feel that the risk is worth the reward.
Achievements
 |
BARREL ROLLED | (50G) |
| Kill a Special Infected with an exploding barrel. | ||
Note: It's possible to obtain the TOWERING INFERNO and BURN THE WITCH achievements with the fire from Explosive barrels as well, but the BARREL ROLLED achievement is the only one directly connected with the use of Explosive barrels. In theory, if infected walk into the fire after the initial explosion, it will also count towards the 101 CREMATIONS achievement; in practice, the explosion damage usually kills nearby Infected before this occurs.
Notes
- The explosive barrel shares a similar model and general purpose as its Half-Life 2 counterpart.
- Exploding barrels send out shrapnel and barrel scraps capable of inflicting modest damage on incautious players.
- The Spitter's acid attacks do not corrode the barrel nor will they detonate it.
- No Infected can cause it to explode on their own. It must be triggered via gunfire, flames, or explosions.
- The Boomer's explosion can detonate the barrel, however, despite the Boomer's explosion being unable to harm survivors directly.
| Weapons | |
|---|---|
| Primary Weapons | |
| Tier 1 | |
| Tier 2 | |
| Special Tier | |
| Secondary Weapons | |
| Sidearms | |
| Melee Weapons | |
| Special Tier | |
| Other Weapons | |
| Grenades | |
| Upgrades | |
| Fixed Weapons | |
| Items | |
| Usable Items | |
| Special Items | |
| Featured in both games / L4D1-exclusive / L4D2-exclusive (Counter-Strike weapons / PC-exclusive) | |